07740 877 544
Estimated reading time: 18 minutes
This in-depth guide will explain how to stain a wooden sign using a paintbrush. This photo-packed process shows lots of useful tips, gained from years of painting sign panels and honours boards.

You’ll learn how to prepare the surface, stain the wood, add decorative lines then varnish to a professional standard. The methods used in this guide can be transferred to other wood painting projects and will help you in improving your overall brush painting ability.
- Why stain and varnish wooden panels?
- Materials used for this project
- Getting started
- Stain the back first
- The first coat
- Follow the woodgrain
- The second coat
- Painting the mouldings
- The solid surround
- Taping the decorative lines
- The golden touch
- The varnishing process
- Flattening the varnish
- Like a glittering prize
- Key Points
Why stain and varnish wooden panels?
In the sign industry, hardwood and softwood panels have been used for hundreds of years. Today, they’re mainly used for their decorative appeal as wooden signs and honours boards – especially natural wood grained panels.
Due to resources and costs, wood grain panels used mostly for decorative effects are made from plywood and veneered plywood. The veneered plywood is comprised of thin, glued wooden strips sandwiched between wood grained outer layers. Plywood sheets come in various thicknesses from 2mm to 18mm.
For this bespoke honours board project, 12mm oak veneered plywood is used. Mimicking the natural wood grain of sawn oak. The wooden frame surrounding the face (mouldings) is made from MDF and routered/shaped hardwood.
Materials used for this project
- An honours board made by a carpenter
- One 1” (25mm) and one 1.5” (40mm) long haired paint brushes
- Exterior grade teak finish wood stain (oil based)
- Yacht varnish (exterior gloss – oil based)
- Dark brown gloss paint (oil based)
- One Shot gold metallic enamel
- 320 grit sandpaper
- White spirits
- Clean, lint free cloths
- A dusting brush
- 2” (50mm) masking tape
- 3M Scotch Fine Line .5” (12mm) tape
- A tack rag (optional)
- Isopropyl alcohol (optional)
Getting started
Learning how to stain a wooden sign, is a fundamental signmaking skill. Preparation is vital to ensure a safe and successful result.
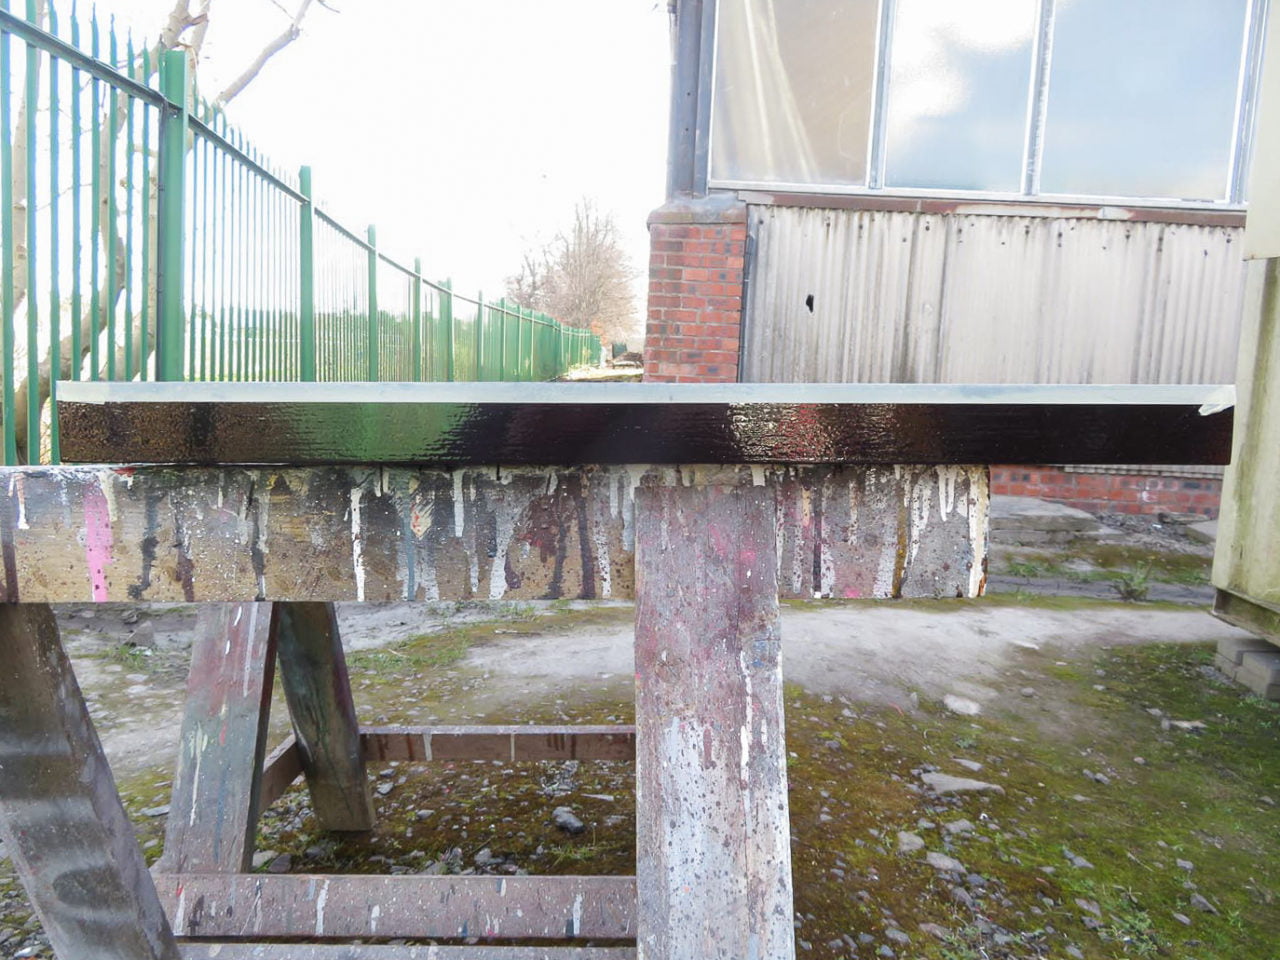
Always have plenty of clean cloths available for any unforeseen spillages or splatters. As well as a dust free environment and a hazard free working area. Trestles or a stable surface at a suitable painting height are also advised to avoid any strains or mishaps.
Fabricating bespoke wooden honours boards which will last indefinitely indoors, requires experienced carpentry skills. I contract a joiner to manufacture the honours boards which I paint and letter.
Stain the back first
I paint the back of the board completely, before turning over to paint the face. This prevents any marks which may damage the face if I decide to paint the back of the board last. I also make sure the honours board is stable and not wobbling about. Any wobbling will hinder the painting strokes.
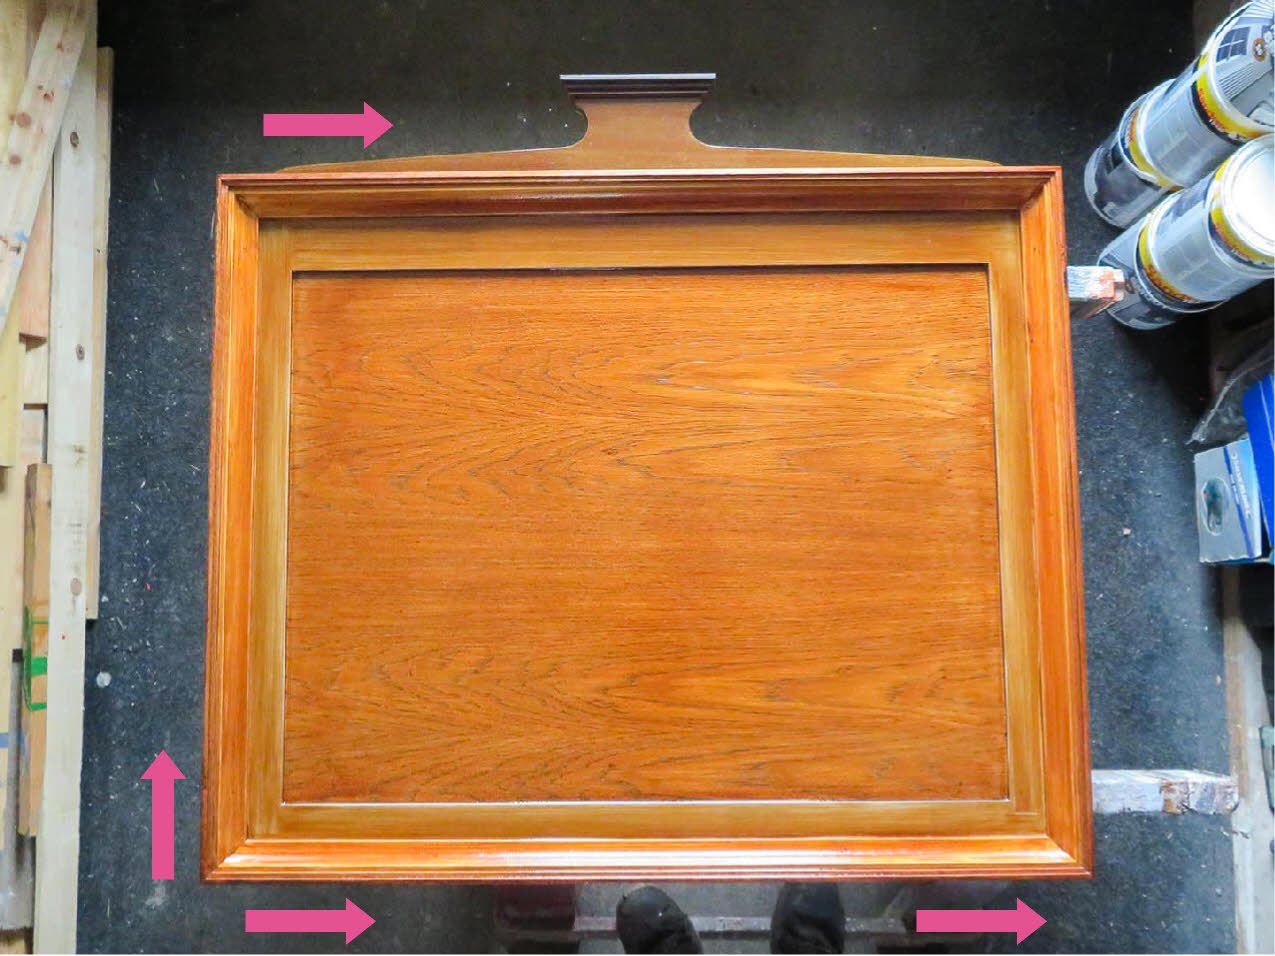
Plan a route for painting, beginning with the central face of the board.
I know that the flat MDF surround will be finished in a solid colour rather than a wood stain. I choose to paint the surround a solid colour, due to the MDF having no grain. As well as to avoid seeing the edges shine through the transparent wood stain.
I prefer to block out the transparency of the wood stain on the MDF with a darker brown. By painting the hardwood frame solid brown, the central face then becomes the main focal interest. You can consider complimenting your wood stain with a solid colour.
The first coat
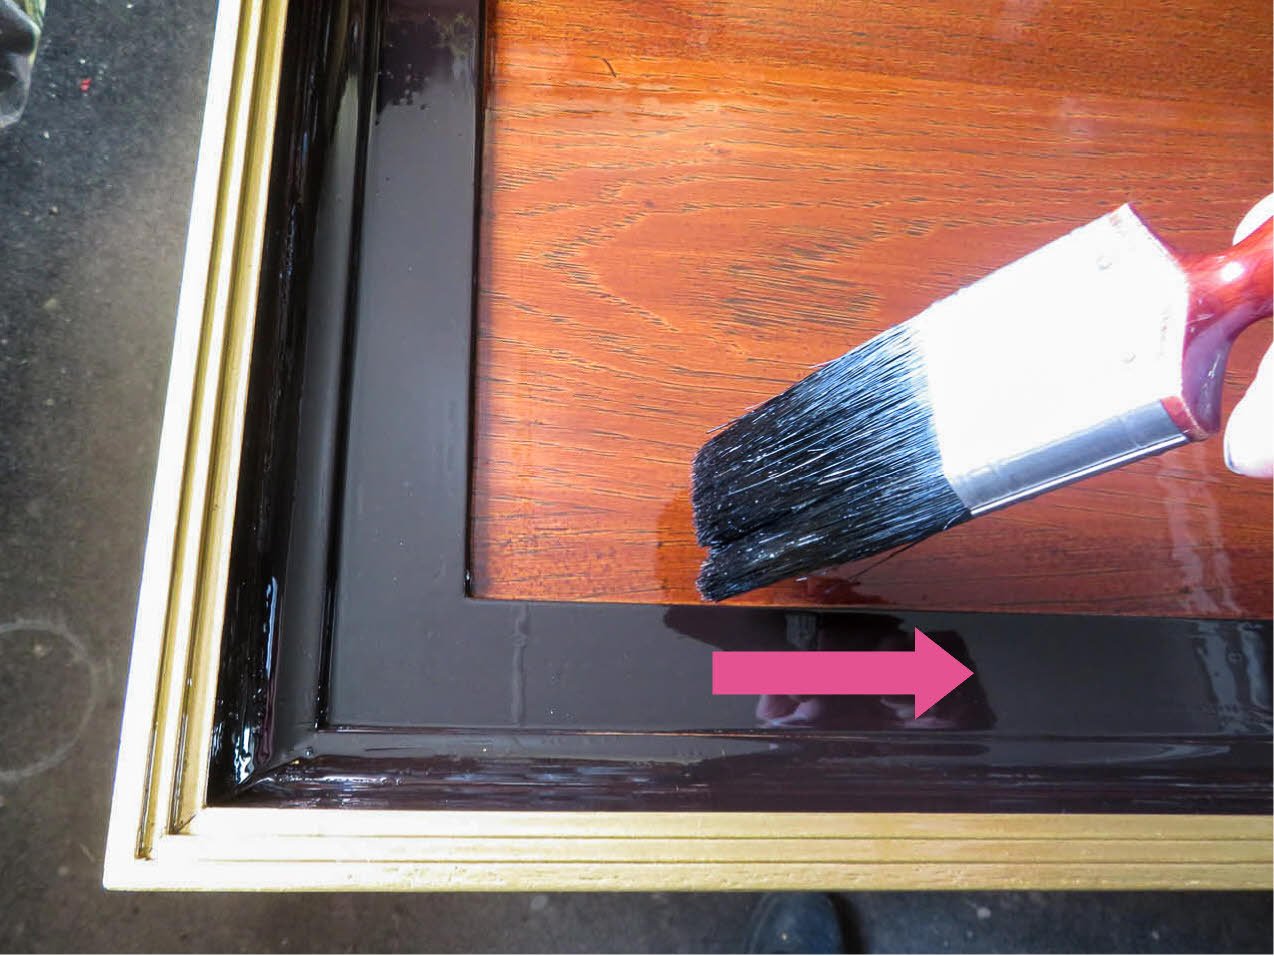
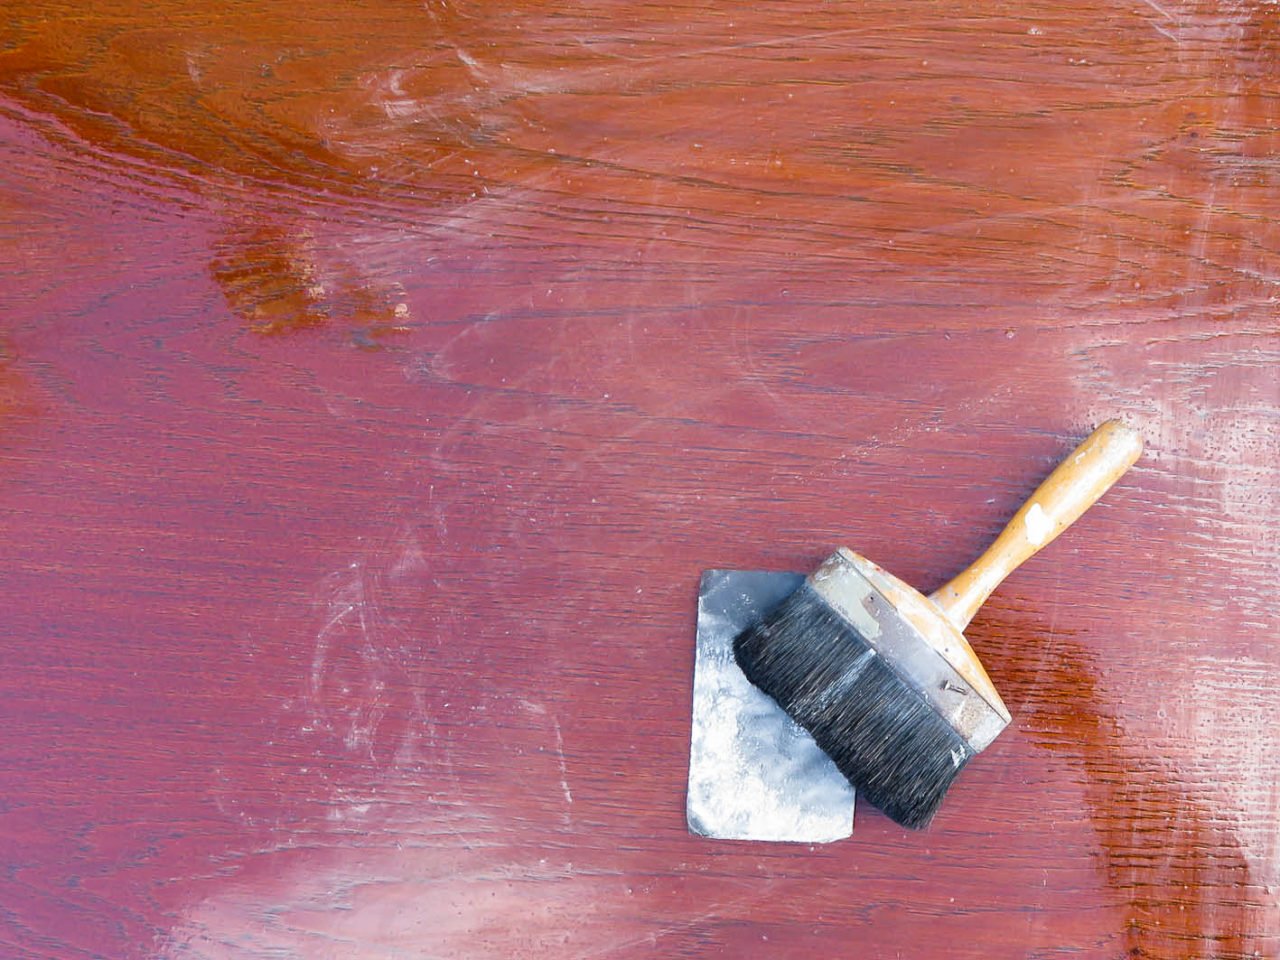
After thinning the wood stain to a workable consistency and staining the face, I finish by flowing the brush strokes in the direction of the grain.
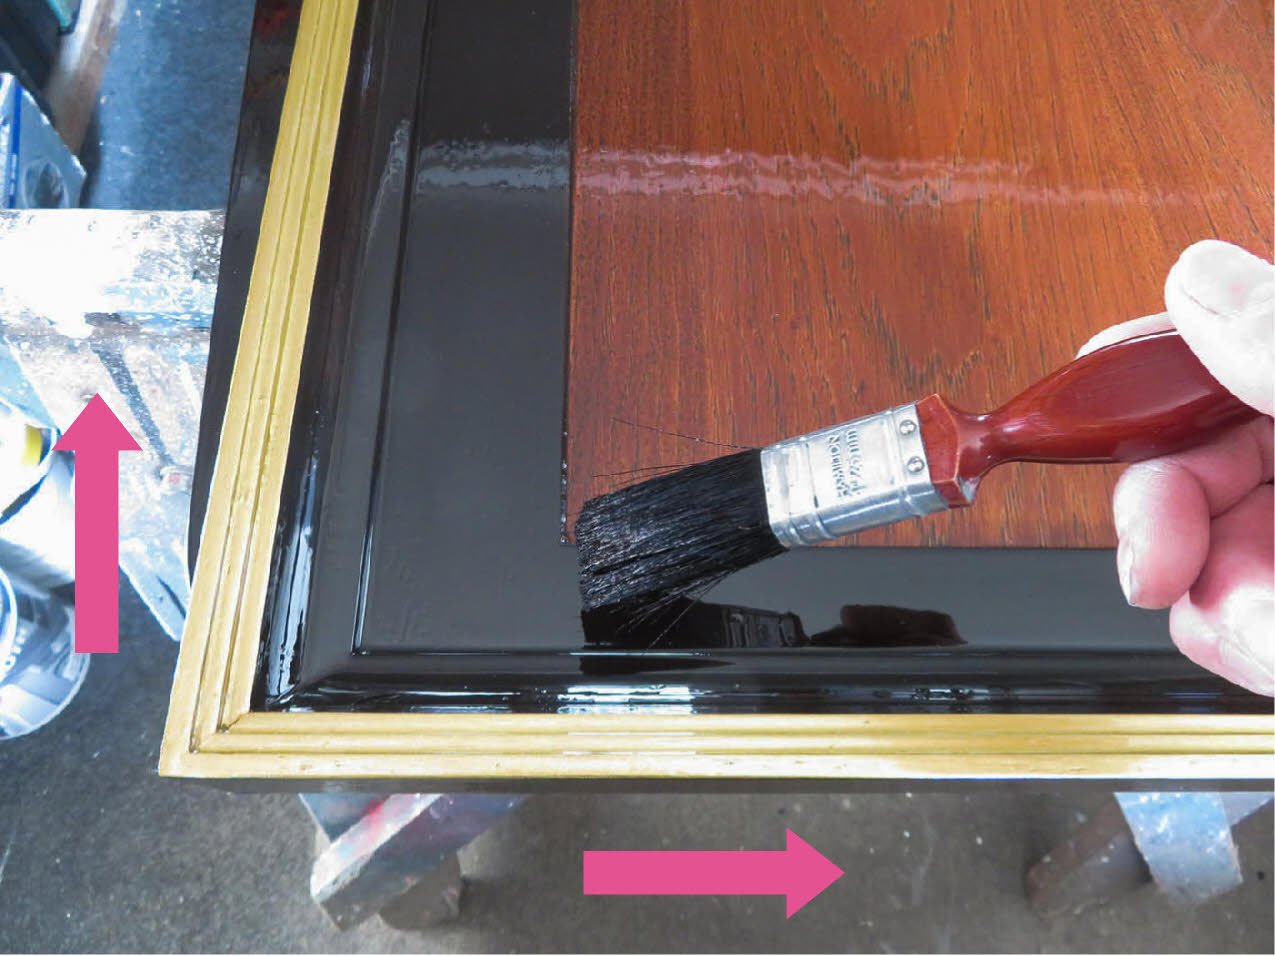
Now I can paint the surround, also following the direction of the grain. Again, by dividing the areas which I paint and moving quickly, I leave a wet edge and paint around the face.
Any small splatters or drips which land on the face are gently flicked and smoothened with the tip of the paintbrush. Always following the brush strokes with the direction of the wood grain.
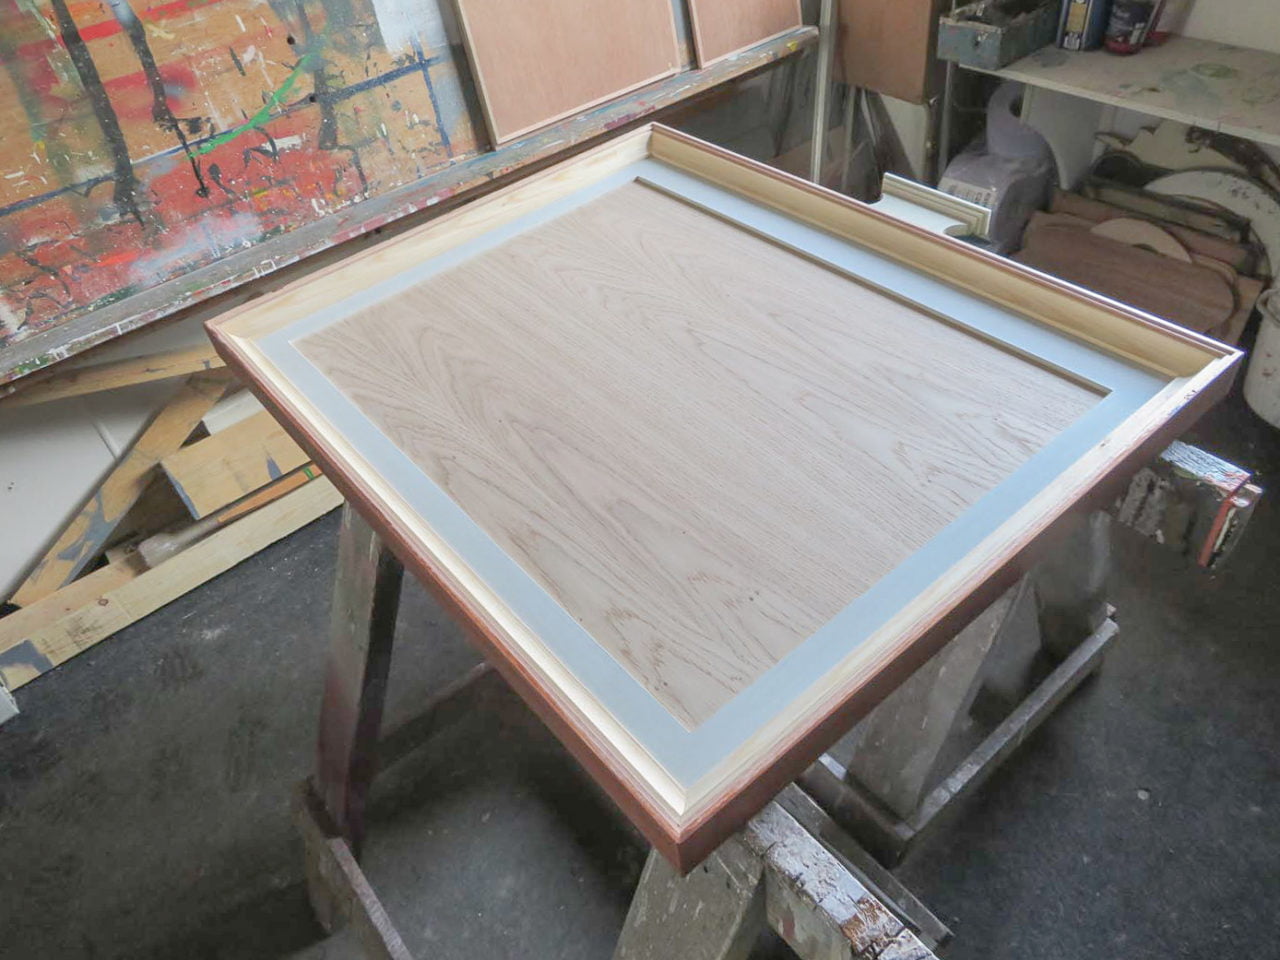
Follow the woodgrain
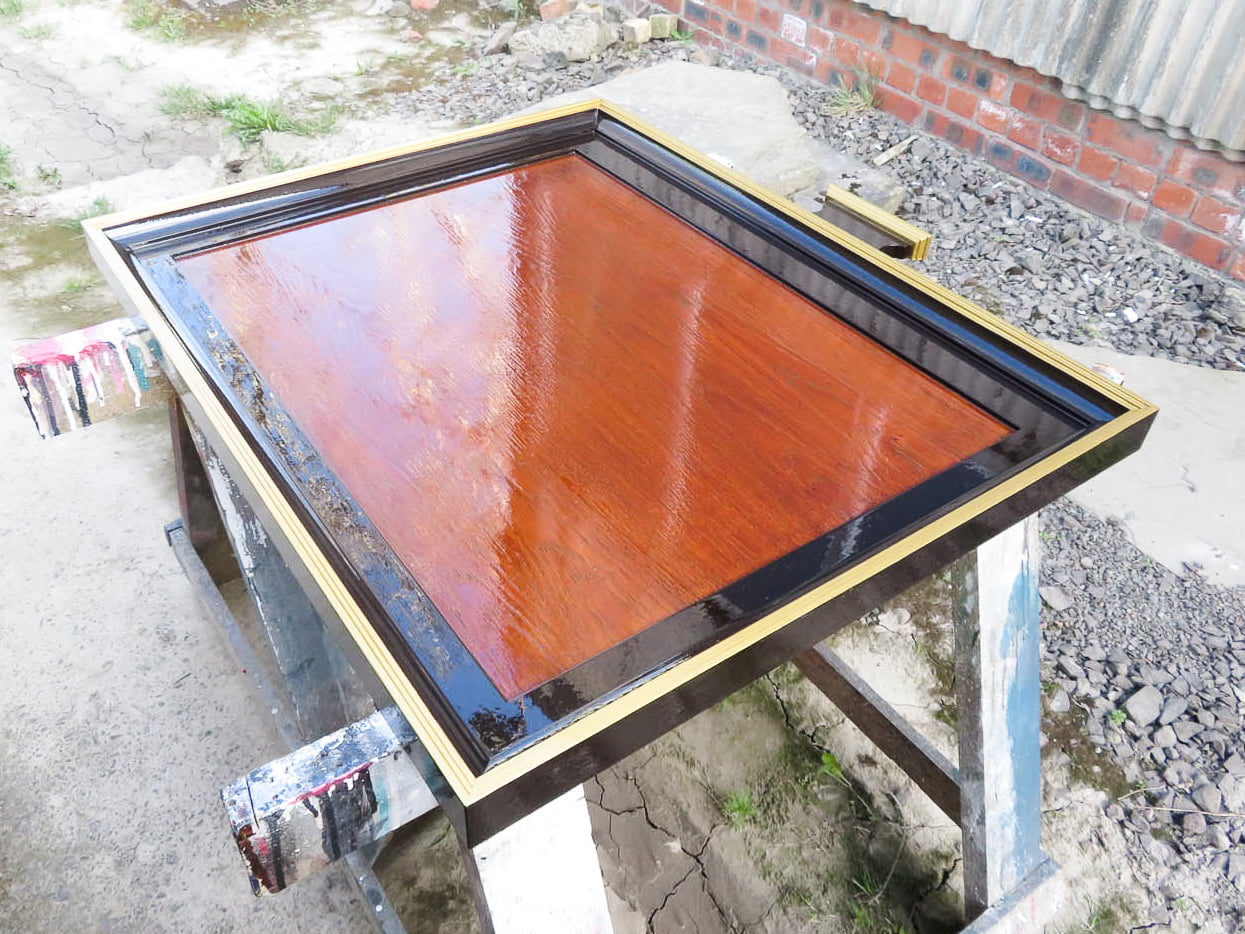
This is the board after one coat of teak wood stain. Painted with the brush strokes finished in the same direction of the wood grain.
You may wish to use a wood sealer or primer coating for the first coat on your wooden panel. I use this brand of paint often and trust that the first coat can be applied directly without any sealer on the surface.
It’s always sensible to test your coating first. Paint on a sample panel or on the back of the board if the back isn’t visible.

There are many different wood finishes to choose from, ranging from white/yellow hues to almost black, solid browns. Teak stain with a darker frame is my preference for gold lettered honours boards.
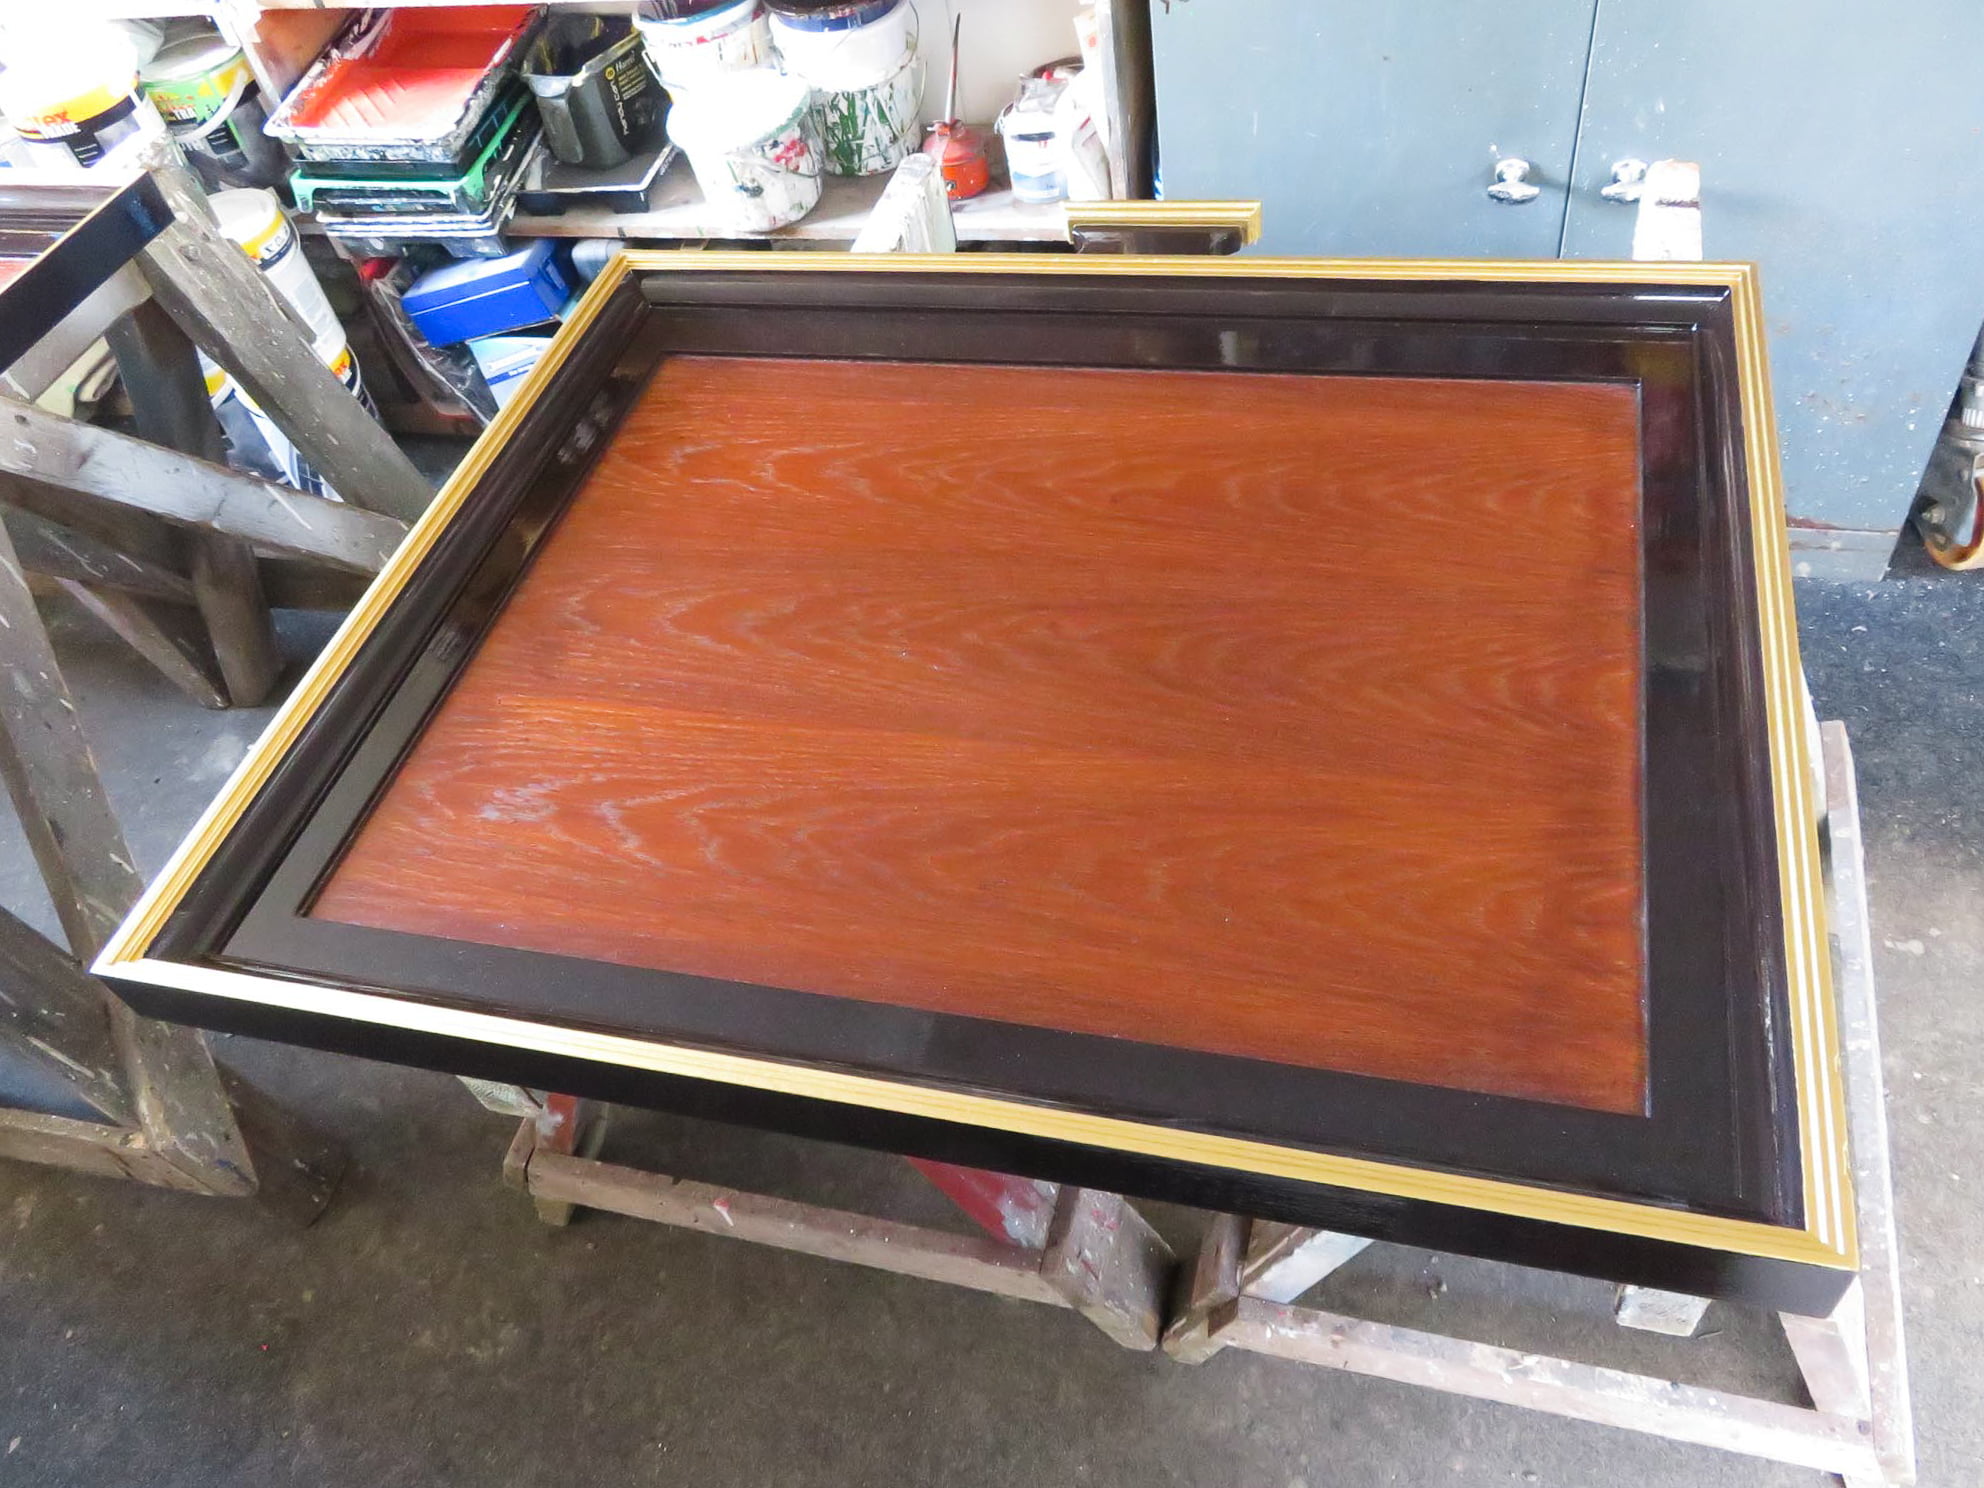
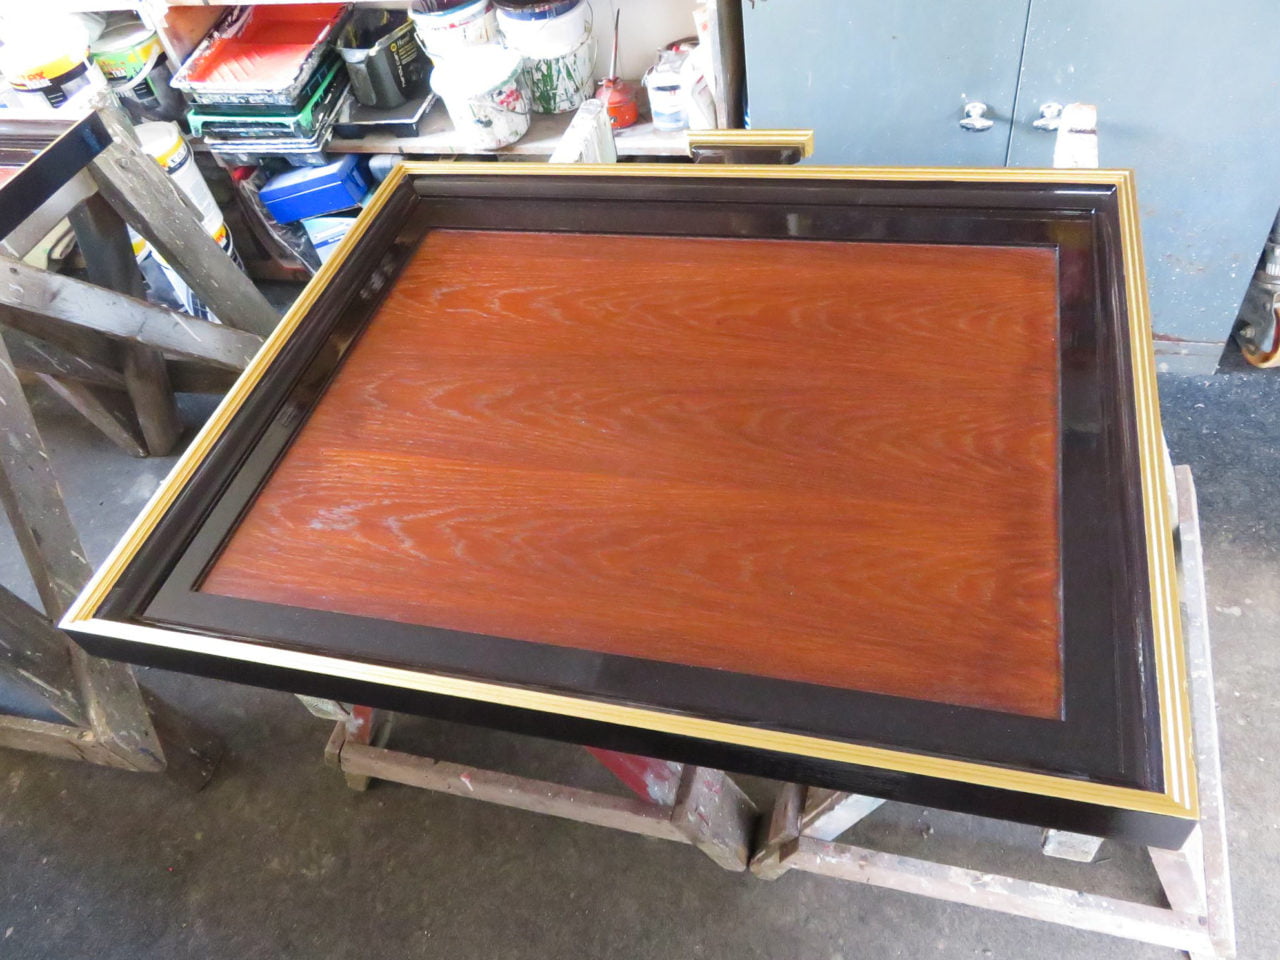
The second coat
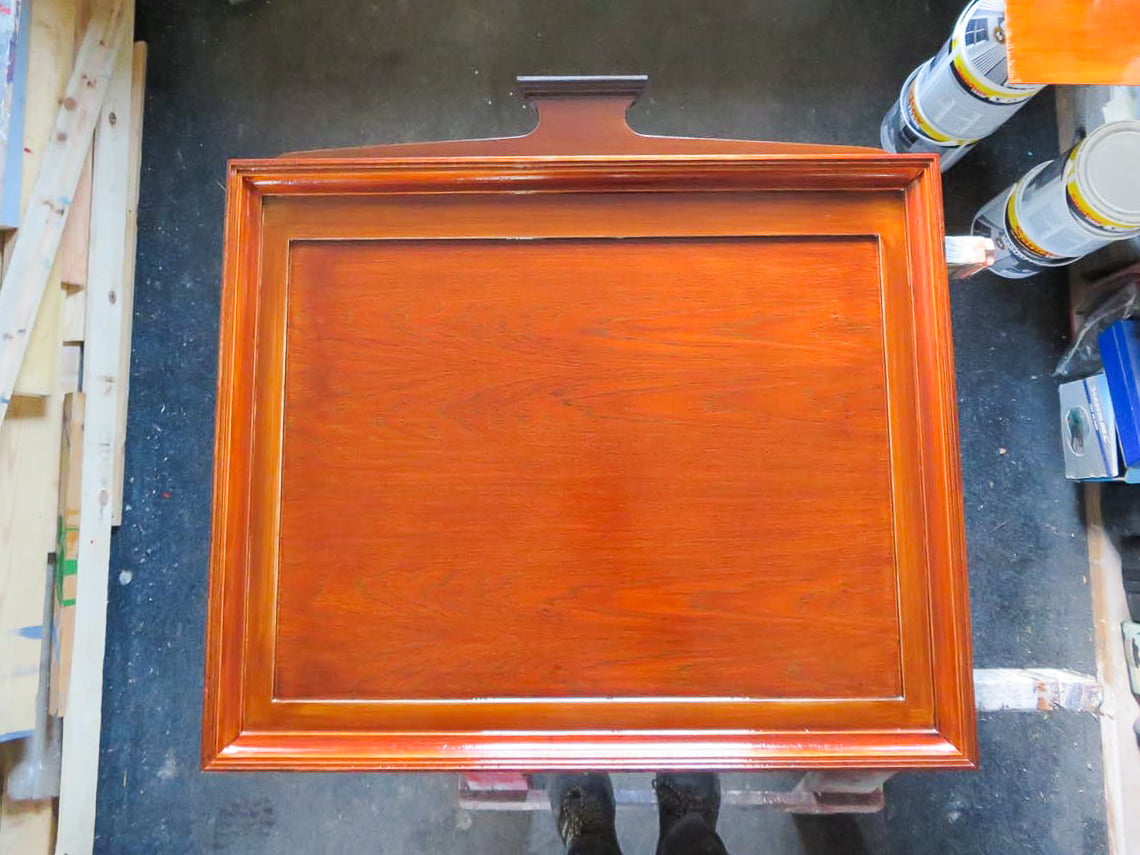
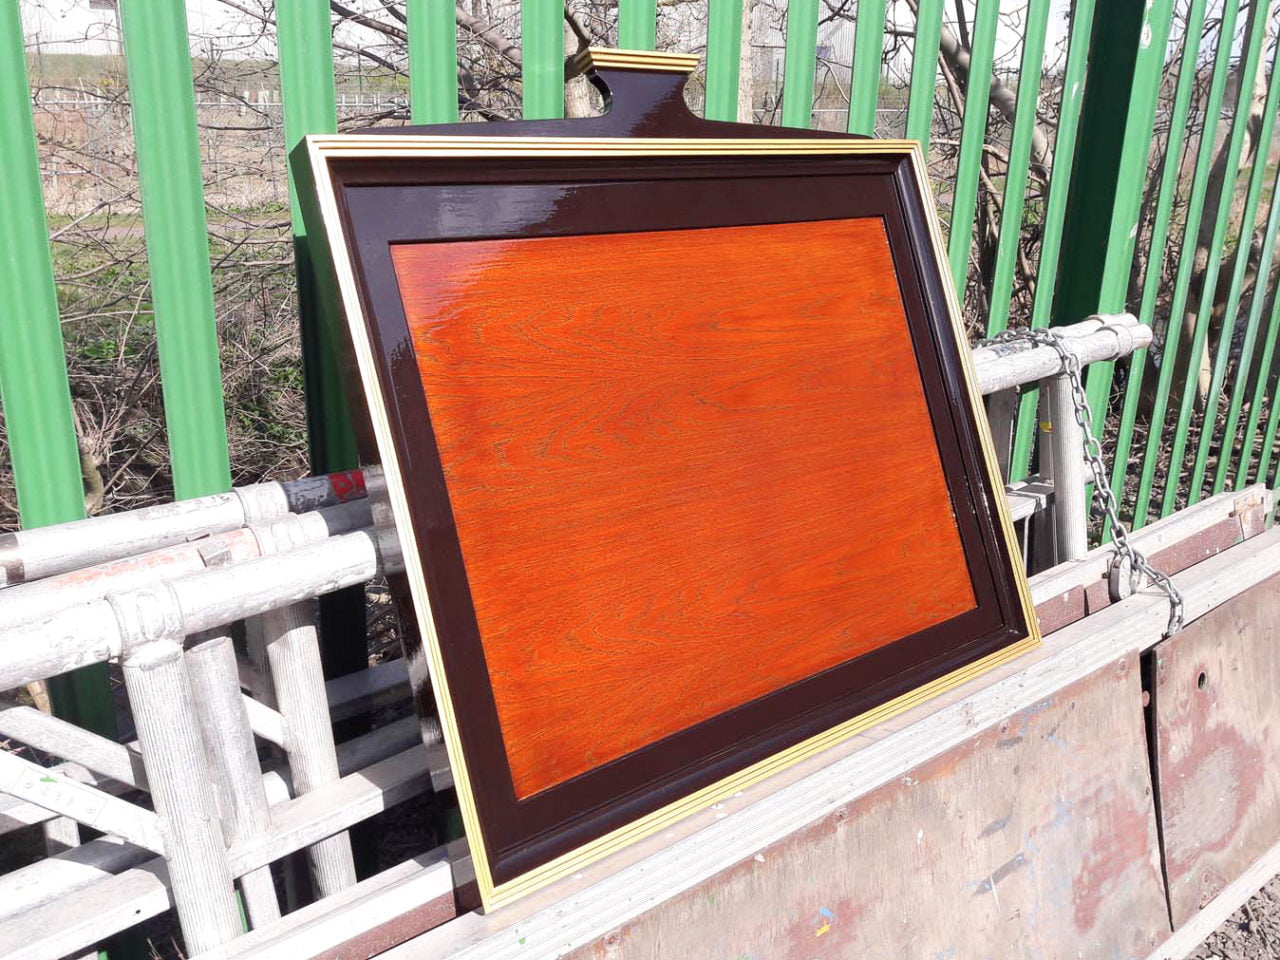
Just the right shade of brown/red background on the central face to complement metallic gold lettering. But not too dark as to obliterate the oak veneer.
The drying time for the first coat took approximately two days as the temperature was cold. Although the wood stain may appear dry to touch, the coating can take weeks to fully cure. Always use your fingers’ knuckles to test the tackiness or dryness of the coating. Never use the front of your fingers as you’ll fingerprint your semi-dry sign!
The surface should feel fully dry before any further coats. Your knuckles should glide smoothly over the surface without dragging or marking the panel. If you feel any resistance or are unsure, err on the side of caution and wait a further day before coating again.
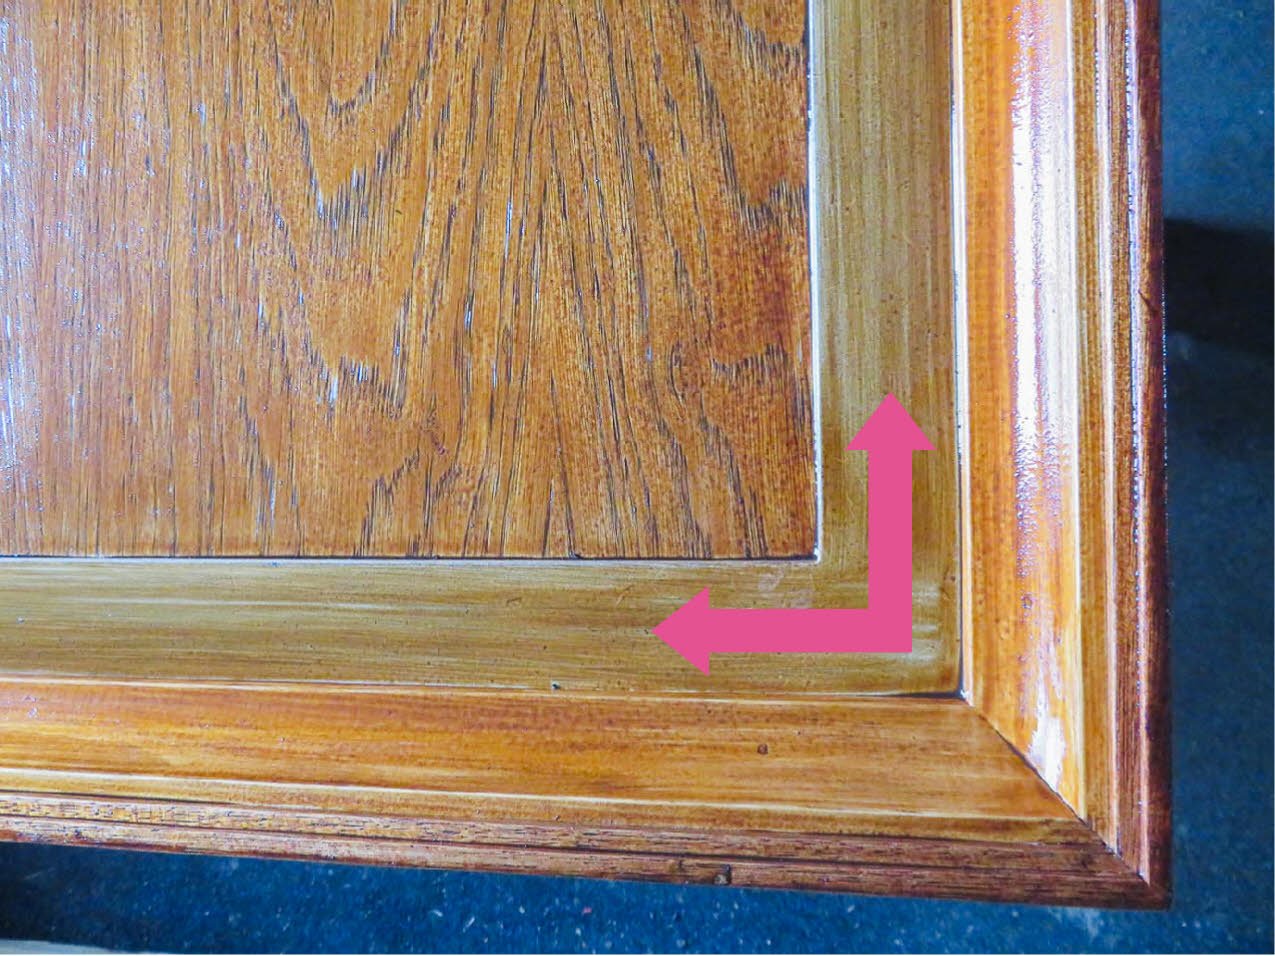
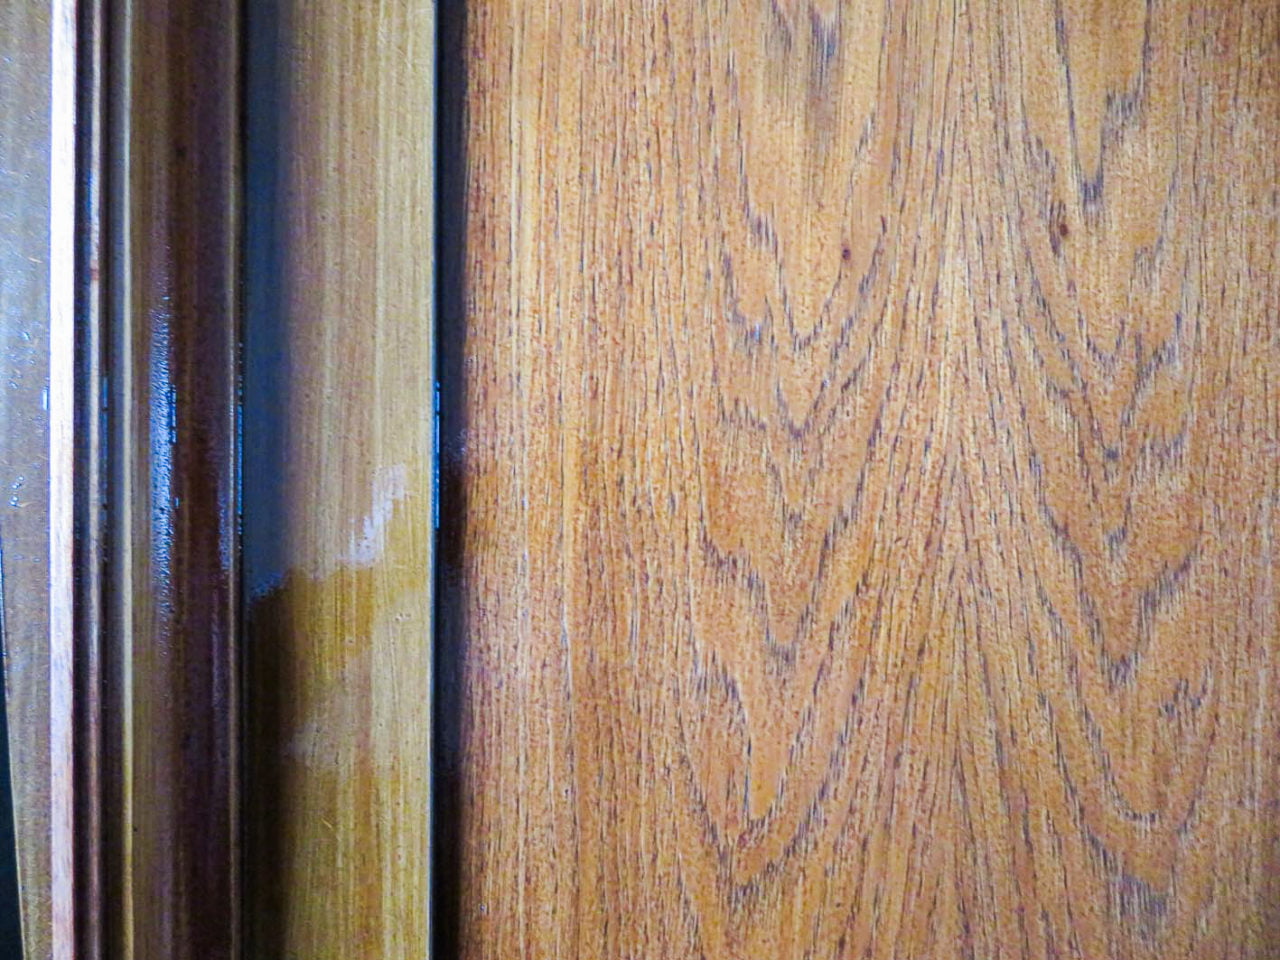
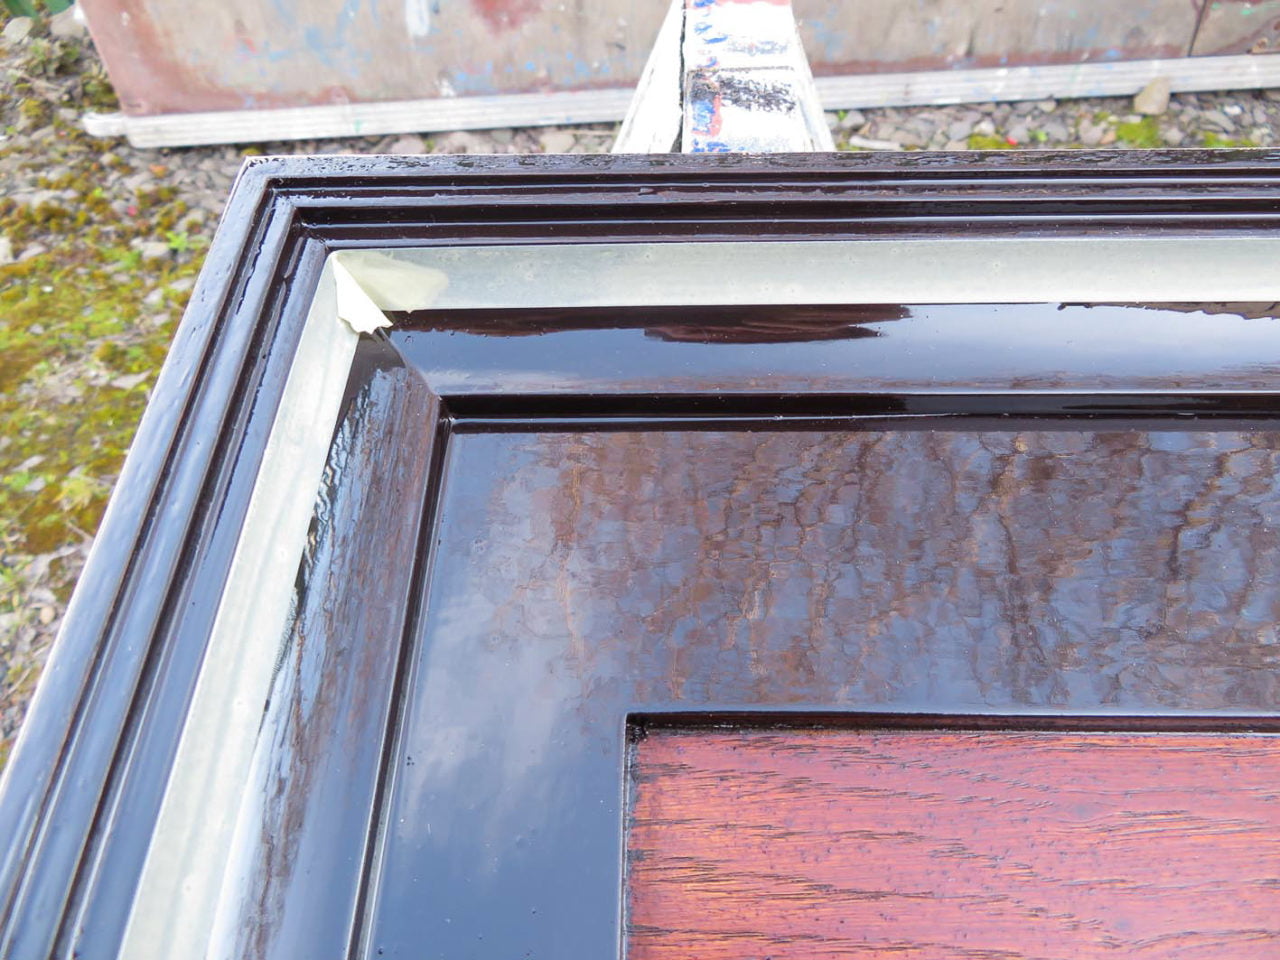
As you can see in the photo, the MDF surrounds’ corner edges are shining through the stain. The coating is too thin, and the angle is too sharp to avoid the edges shining through.
This is the main reason for making this type of frame surround a solid colour. The teak wood stain is simply too transparent to fully cover the sharp corners.
The purpose of an honours board is to recognise the achievements of the people or events honoured. This board will be displayed prominently for people to read and enjoy for many years to come. It’s important to create the visible prestige that the board deserves.
Painting the mouldings

Using 2” (50mm) masking tape, I apply the tape to the central face. Make sure that the tape is tightly pressed (and cut with a sharp craft blade if necessary) into the corners. Any tape edges which are not pressed down hard enough will allow the paint to seep below.
After painting wood, fibres in the material react and rise to the surface. Using 320 grit sandpaper, the routered mouldings are gently sanded and smoothened to reduce the harsh furriness of their surface.
Steel wool or flexible sanding pads can also be used, as well as plenty of elbow grease. You may wish to slightly dampen the sandpaper or sanding pad to lessen the abrasiveness and dust. Don’t use too much water as this may absorb into the exposed, bare wooden edges.

I take the boards outside where possible, to wipe away the sanded dust. Wearing a face mask is advisable as well as using a tack rag to remove surface dust, especially in the mouldings’ crevices and corners.

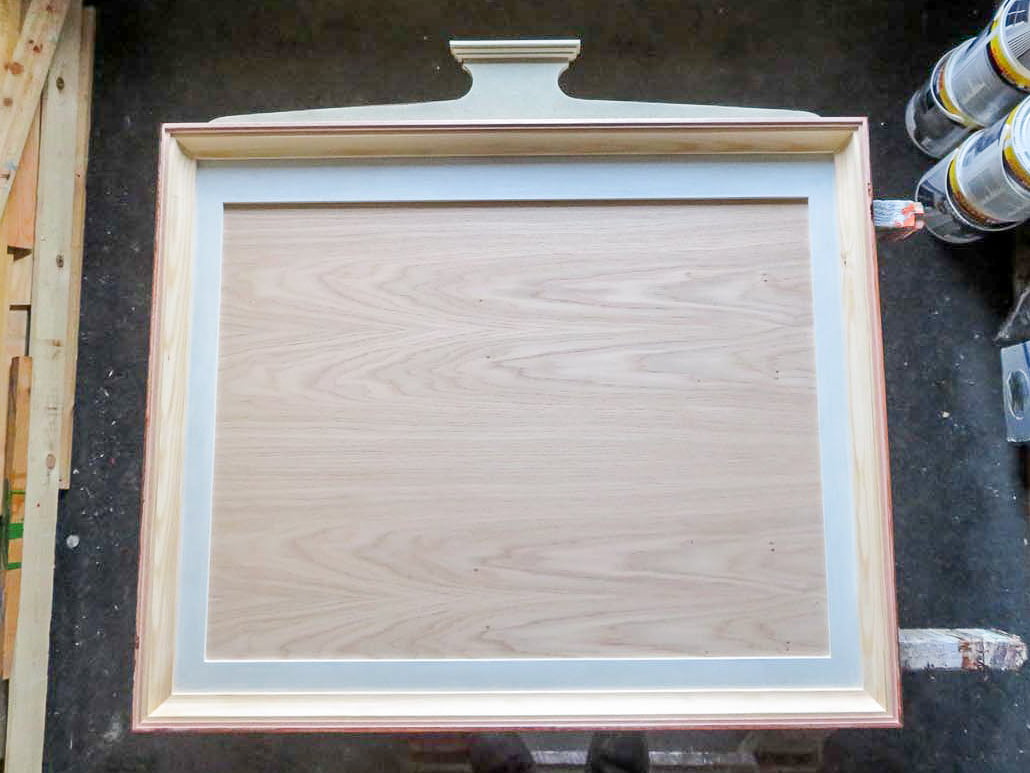
The solid surround
Two coats of dark brown gloss later and the board is beginning to look stronger.
Always use reputable brands of masking tape and seek advice from your supplier. I purchase masking tape from trusted auto body paints distributors, as I don’t want any surprises when removing the tape.
If the masking tape is left on surfaces for too long and/or in cold/damp environments, it’s likely that the removal will be frustratingly tricky. If this happens, use a clean cloth dampened (not soaked) with white spirits. Then rub the masking tape to saturate it and make it more pliable to remove.
If any paint creeps below the edges of the tape, dampen a clean cloth with white spirits. Then neatly remove the still soft paint.
You may wish to use a spatula or rigid edged tool inside the dampened cloth. With the cloth wrapped around the rigid edge, this provides a clean and sharp removal of excess paint, rather than using your fingertips.
The paint will begin to dry as soon as the air is exposed to it. If any paint has seeped below the tape, remove and clean immediately.

So far, the duration of the painting process has been approximately one week. This has included drying times which are extended in colder temperatures.
Some paints take longer to dry than others and application methods contribute to the rapidity of paint drying and curing too. It’s wise to plan for the expected outcome and assess how long these projects will take.
It is difficult to accurately predict drying times or the number of coats required, especially with unfamiliar paints. Plan for the longest duration of painting expected for your project. This will help to plan your schedule and work environment around other painting projects.
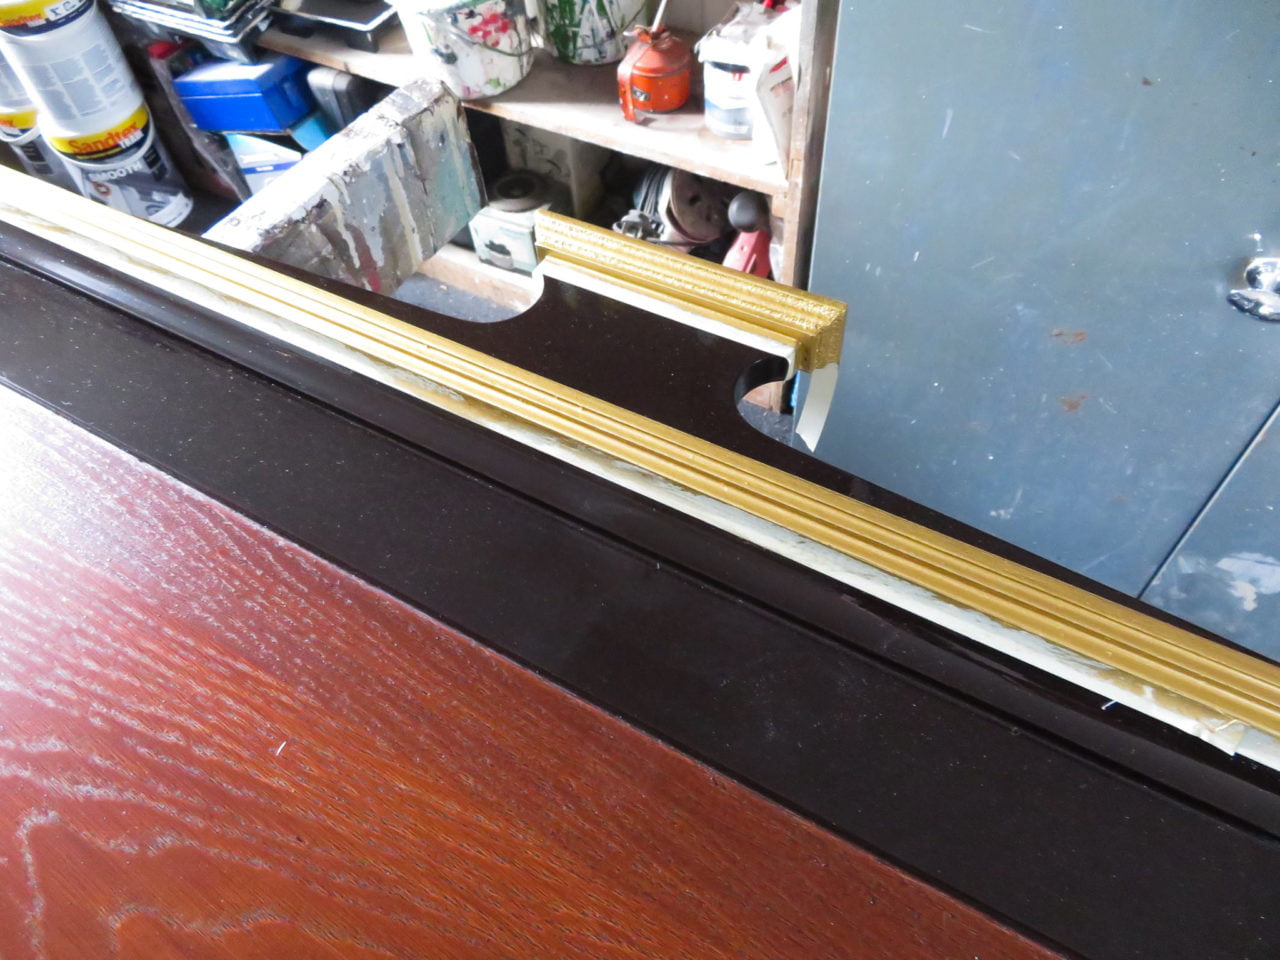
Taping the decorative lines
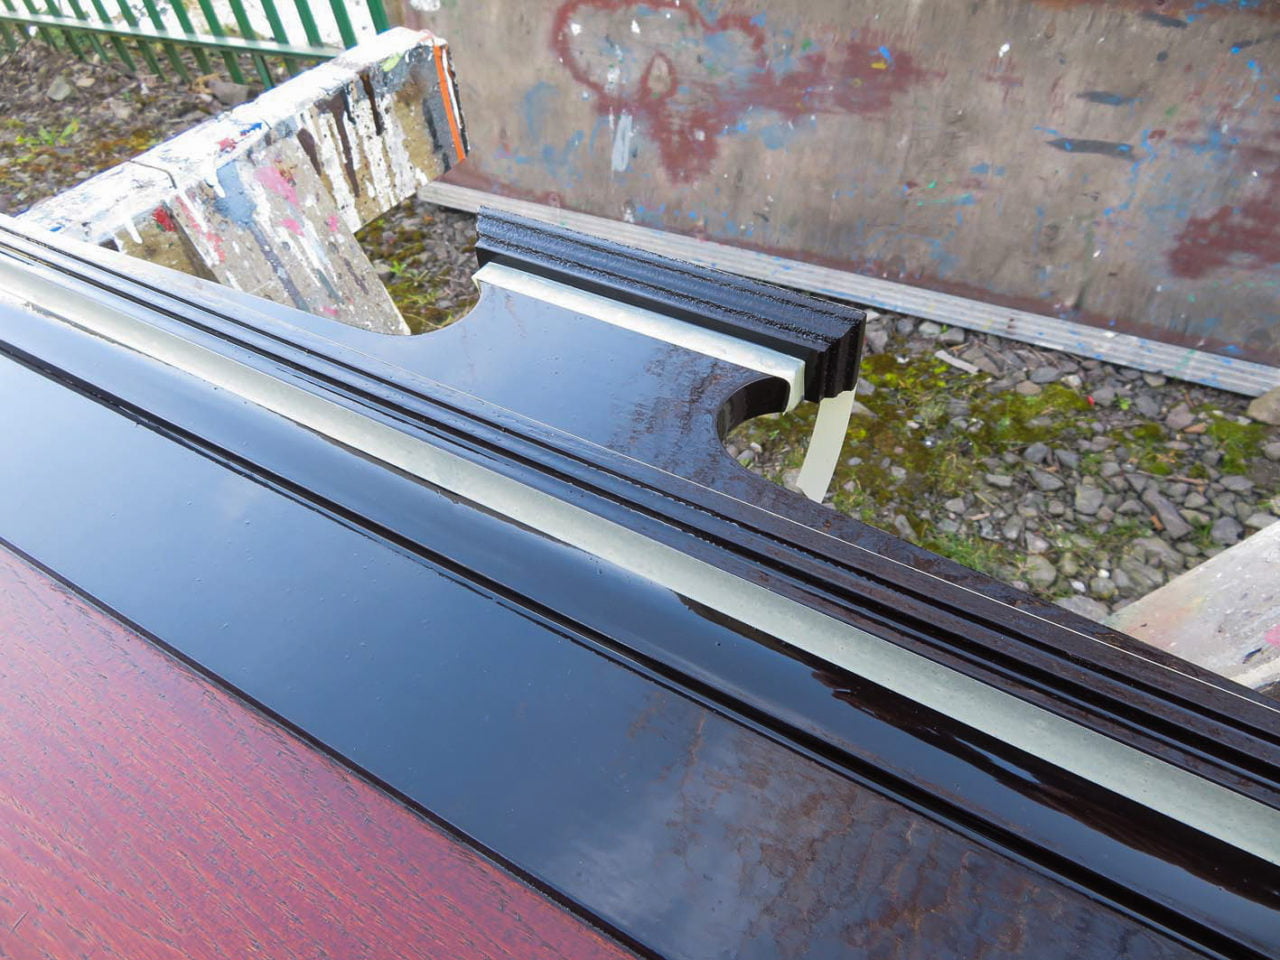
Adding embellishments to honours boards contributes to the prestige of the display. Without going over the top, I choose to pick out areas where I want to divide masses of colour or enhance shapes and angles.
The routered segments of the mouldings will look terrific when painted metallic gold. The paint’s metallic finish will gleam on the carved shape of the routered edges, emphasising the depth of the bevel.
Using 3M Scotch Fine Line .5” (12mm) tape, I pull the tape off the roll and begin by pressing a manageable length onto the surface. Aligning onto the edge where I want the paint contained, I press firmly on a length of approximately 10” (250mm).
With the tape secured by the initial anchor, I then pull the tape tight and slowly move down, towards the end of the edge which I want to be taped. Then, after aligning into position, I begin by gently pressing on the tape and ensuring that the tape edge does not shift.
If the tape moves, I peel back off and repeat the process until correctly lined up.
Only after I’m happy with the tape’s positioning, do I then firmly press onto the surface. Rubbing my finger(s) down hard onto the tape’s paint edge. I then snap off or use a sharp blade to cut gently through the tape.
Taping both sides of areas where I want to contain the gold embellishments will make the lines straight and clean. Some hard to reach or hard to stick areas can also be painted freehand.
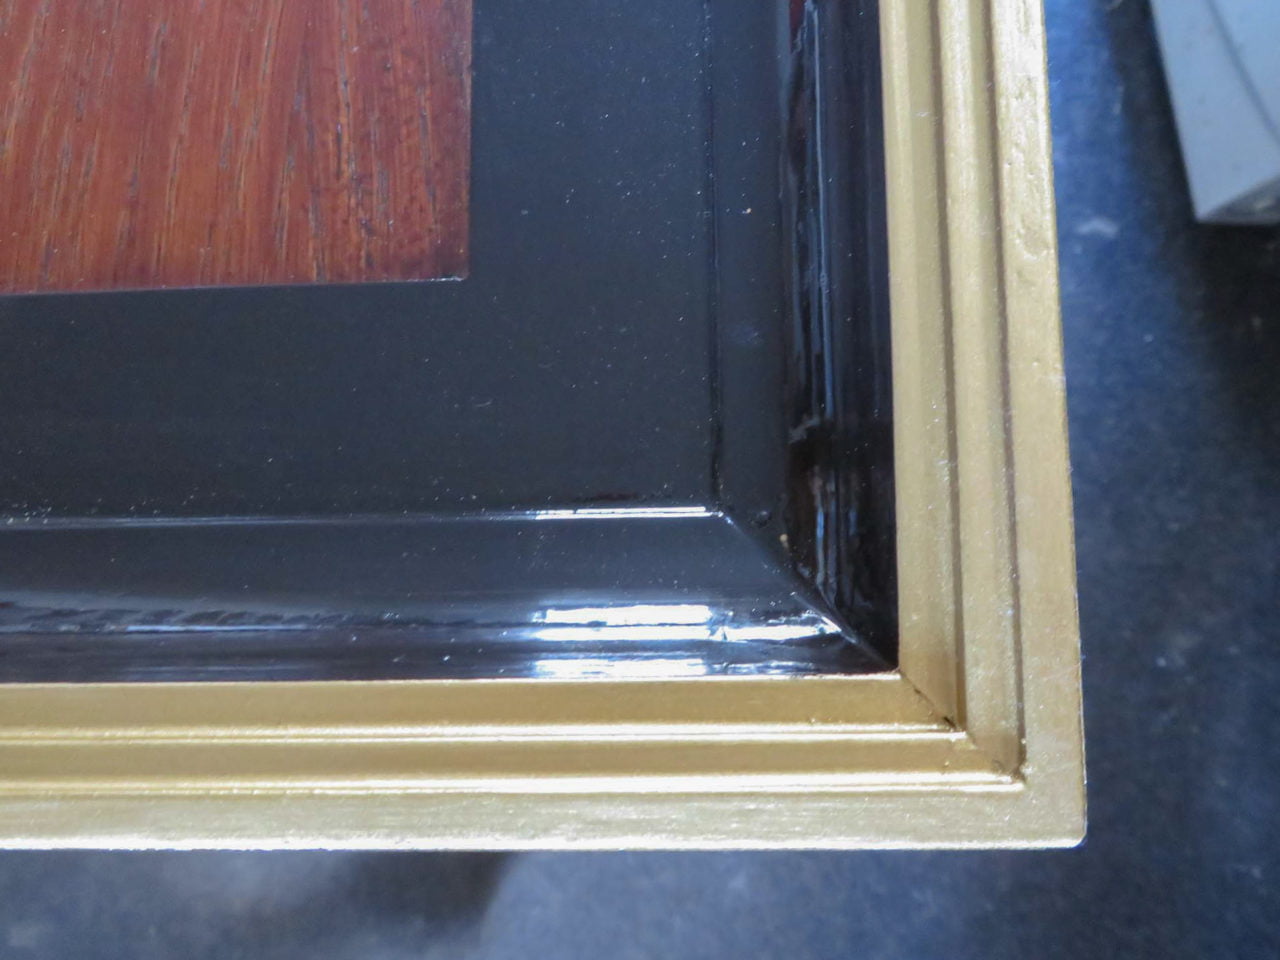
The golden touch
Some gold metallic paints tend to blacken after time. Especially in exterior conditions.
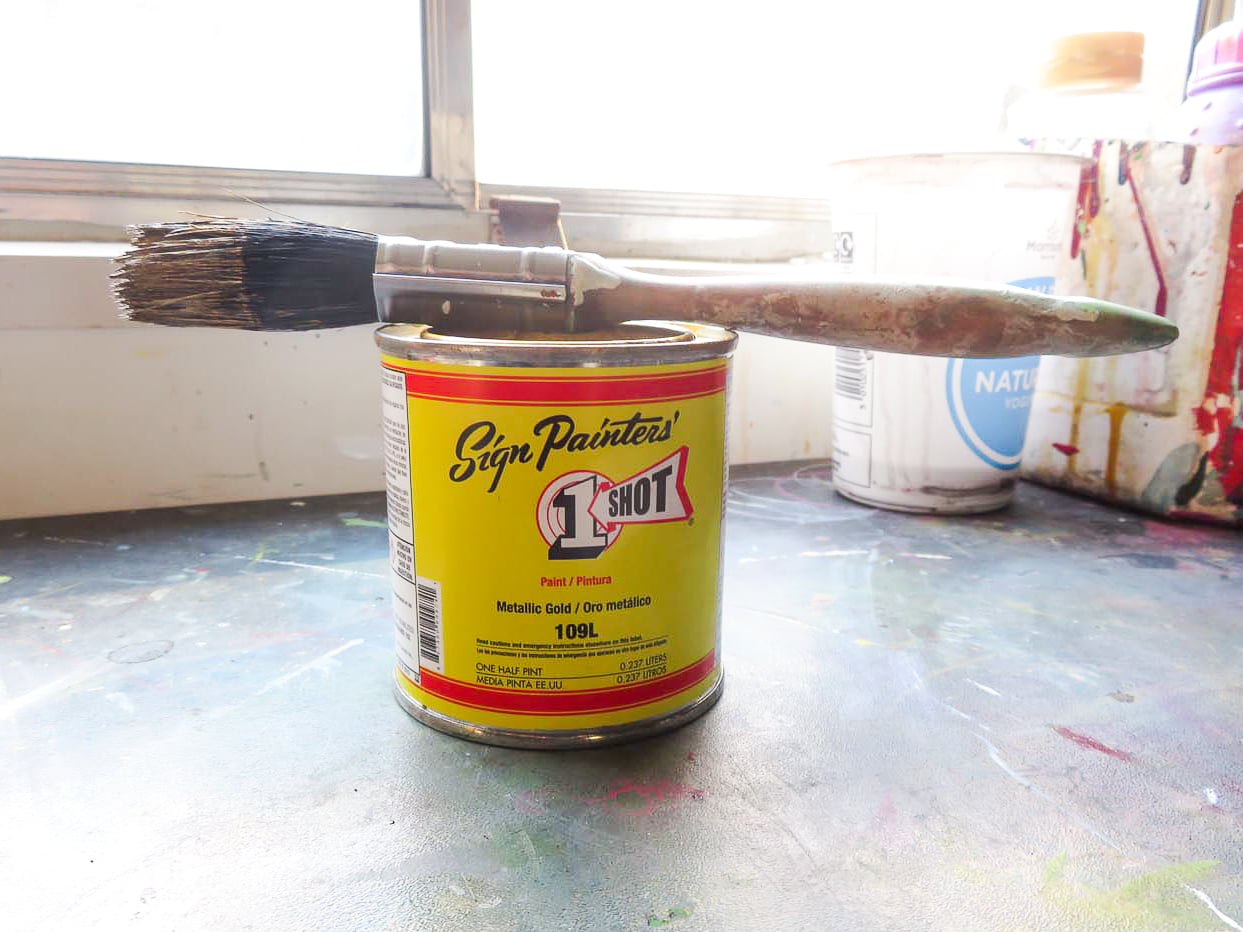
One Shot gold metallic enamel is a trusted paint, used worldwide for decades. The metallic paint dries semi-flat but holds its brilliance for years.
It’s useful to upturn the tightly sealed tin so that it’s sitting on the lid. If left for just a few minutes, the gold flakes and pigment mix inside the tin. When upturned and opened, this reduces time continually stirring until the pigment is mixed thoroughly into the carrier liquid.
Most often, the gold metallic will require thinning with white spirits to make it better flowing and brushable. In this first coat instance, I’m using a freshly opened tin and painting directly without thinning. The paint has decent opacity and goes a long way.
One Shot gold metallic will dry quickly in normal conditions/room temperature. I can wait until the following day before applying a second coat, knowing that the paint will not drag.
After two coats of gold, the paint is completely solid, and I remove the tape.
Due to the paint drying quickly, the tape can be removed soon after painting the areas. You will begin to see patches of the paint drying quicker than other areas but the paint will still be soft.
Again, if any paint has crept below the tape’s edges, slightly dampen a clean cloth with white spirits and gently rub over the excess paint. Don’t over rub or press too hard with the cloth as this may tarnish the paint beneath.
These details are well worth putting the effort into as it transforms the appearance of the honours board.
The contrasting edge shapes, angles, and finishes make this bespoke piece stand out. Worthy of honouring people and events for years to remember.
The varnishing process
Following the same painting route as when the board was initially stained, I now apply a coat of high gloss yacht varnish.
Ensure that the varnish is thin enough to work with so that the brush marks will not be noticed. Using a 2” (50mm) brush to paint the central panel face and finishing in the direction of the wood grain, I flick the brush tip upwards before the central face panel edge.
Similarly, and moving quickly, I paint the surrounding mouldings. By dividing the entire frame into manageable segments and with free-flowing paint, a wet edge should be left throughout the entire coating.
Maintaining a wet edge means that when you are painting, your brush strokes are finished directly next to the previously painted area. Work circularly and quickly.
When finishing brush strokes in corners, flick the brush away from the corner, following the direction of the edge. Repeat this until the brush strokes are even and the paint begins to level on the surface.
After twenty four hours, the varnish is hard enough to lift the board outside onto waiting trestles.
Flattening the varnish
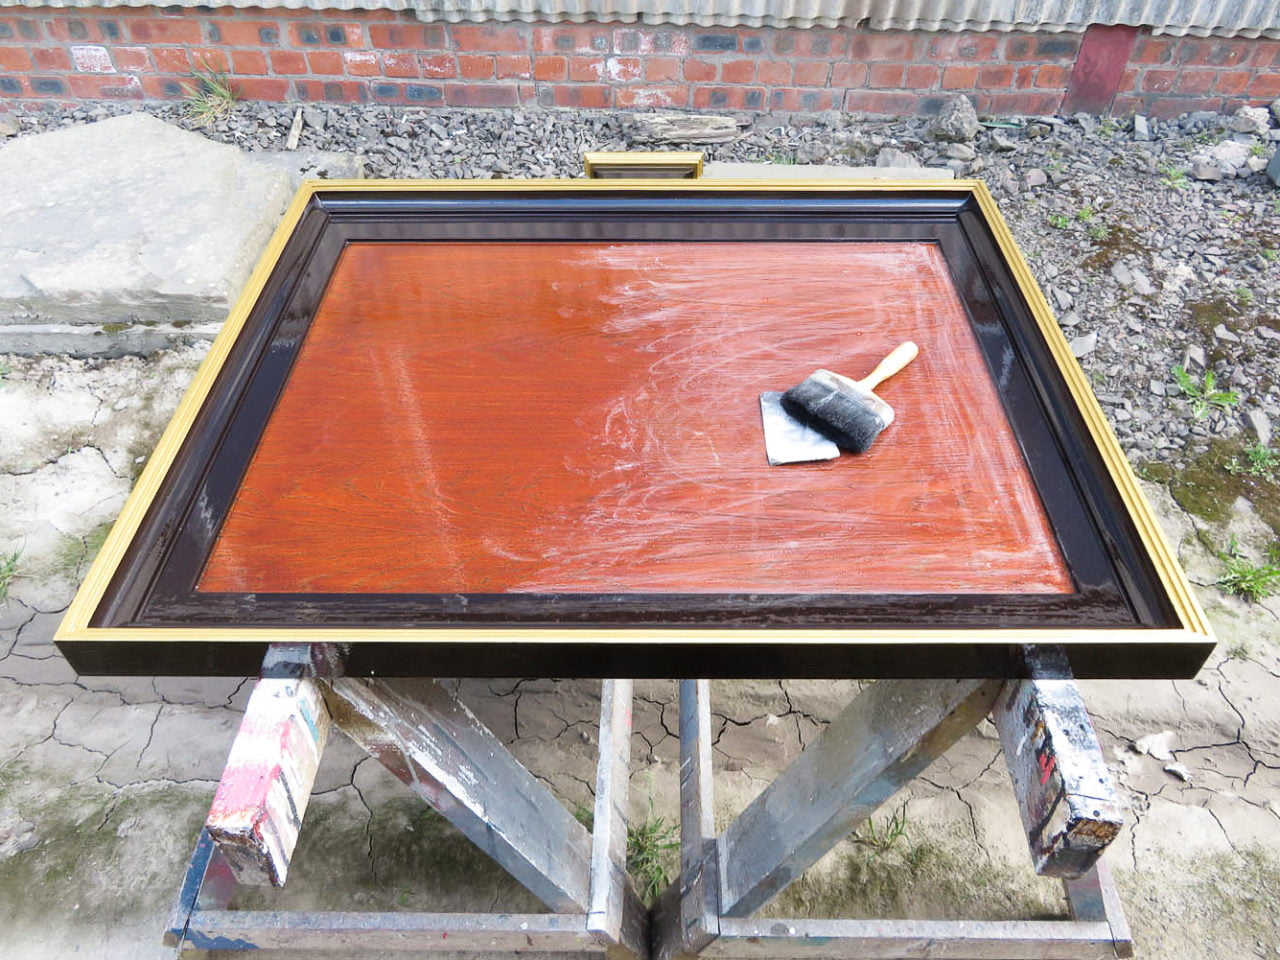
The face is still slightly rough after the two coats of stain and the first coat of varnish. I have the option of using a wet and dry method, which involves dampening the sandpaper with water. I can now flatten the central face with 320 grit sandpaper.
By applying the first coat of varnish, I can sand the face panel without scoring the wood stain underneath. This stage of sanding requires extra attention and restraint, as not to sand too hard. Sanding too much on the same area will tear through the first coat of varnish which will be disastrous.
Always take time to stand back and sweep off any dust. If the sanded area still feels rough to touch, sand more and with caution. Vigorous and repeated abrasiveness on the same area will damage the thin layer of the first varnish coating.
Once all the areas are sanded and the dust is swept off, use isopropyl alcohol or a tack rag to remove surface dust. Alternatively, use a damp sponge or cloth and dry thereafter. Make sure that the surfaces are spotless before the last coat of varnish.
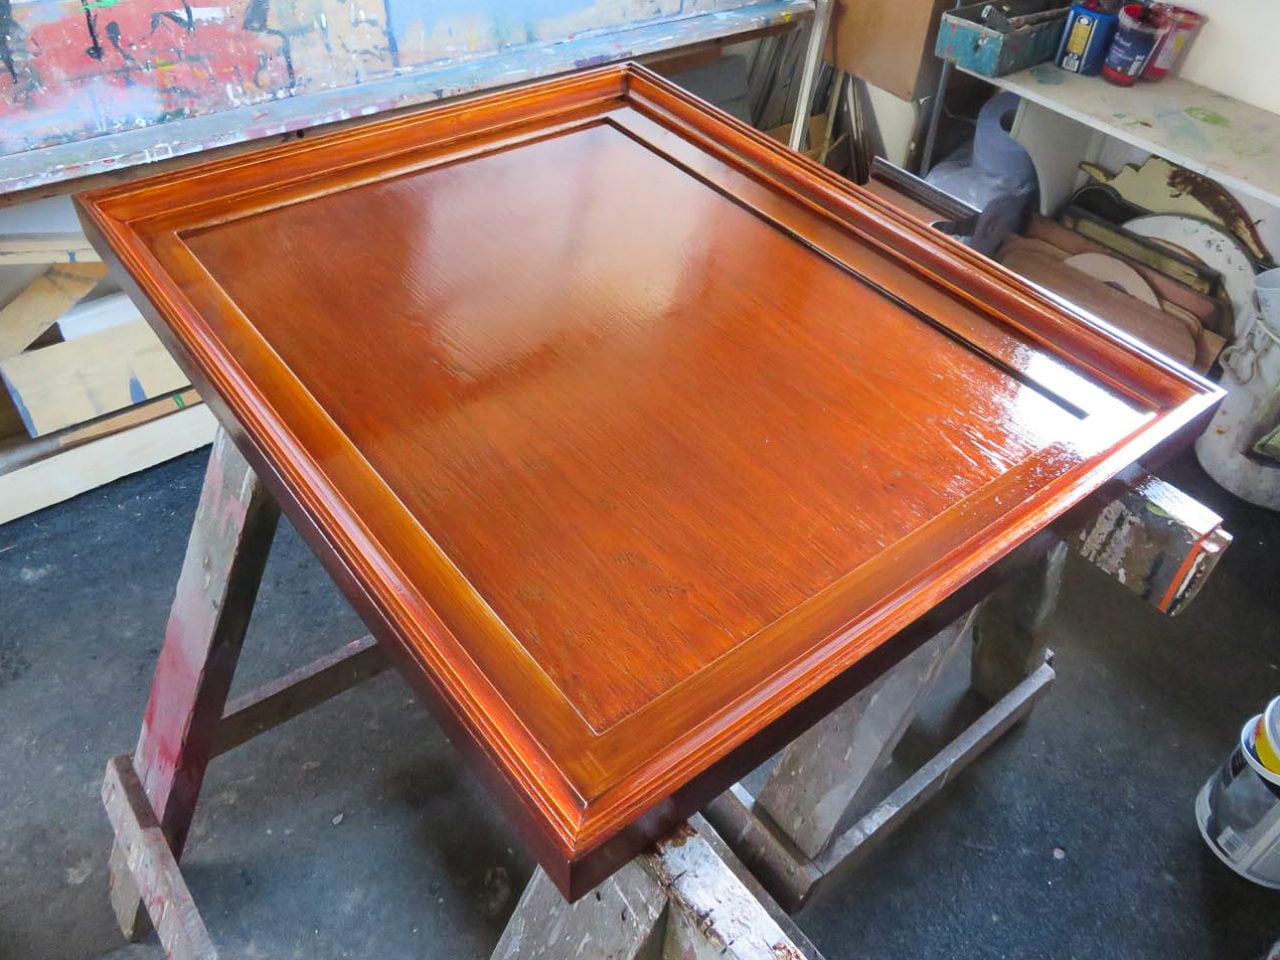
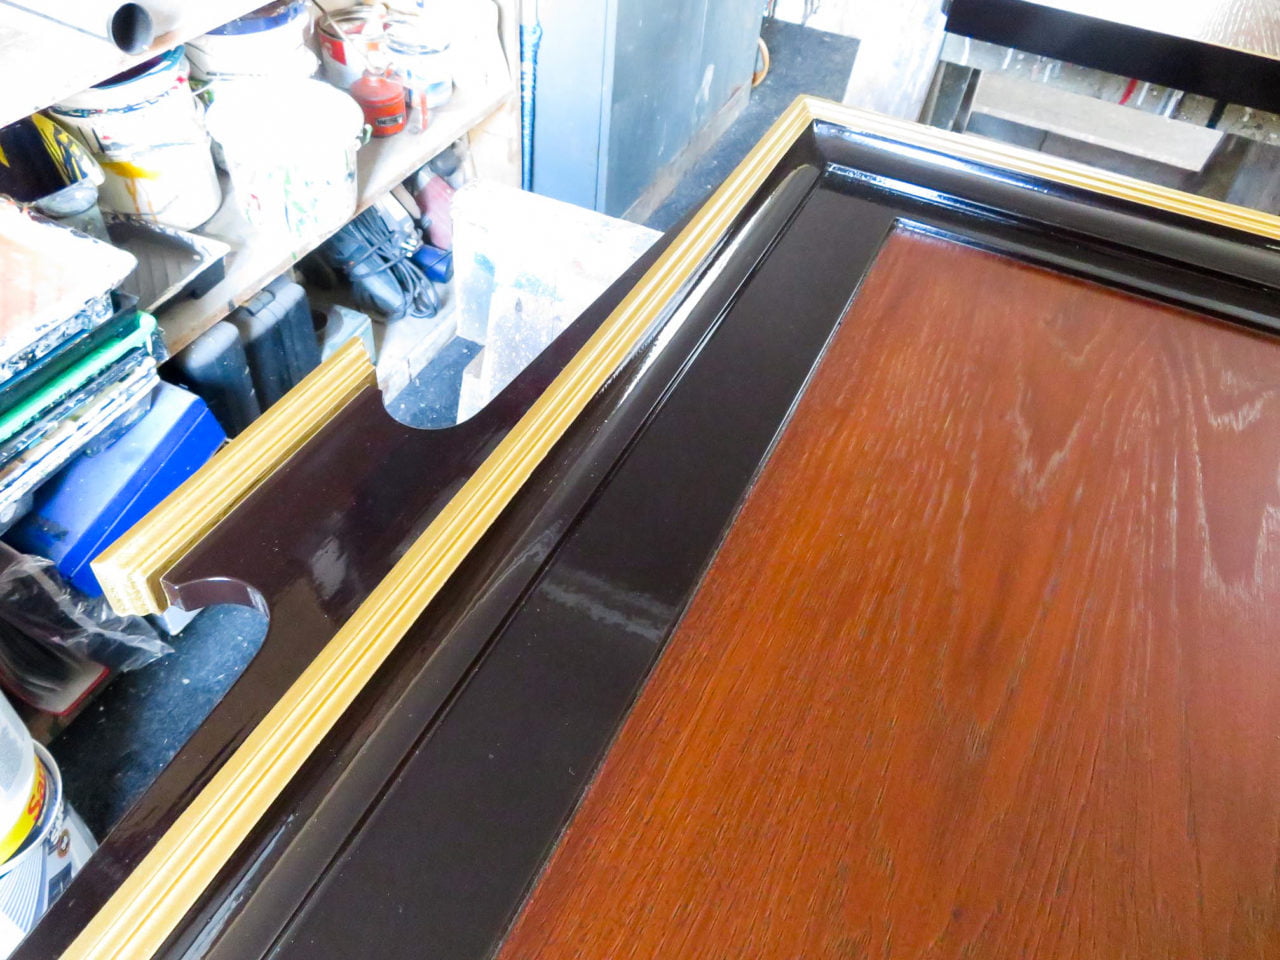
Like a glittering prize
After two coats of yacht varnish, I’m happy with the finish on the board. I may often have to varnish again, depending on how deep the wood grain is and how much varnish absorbs into it.
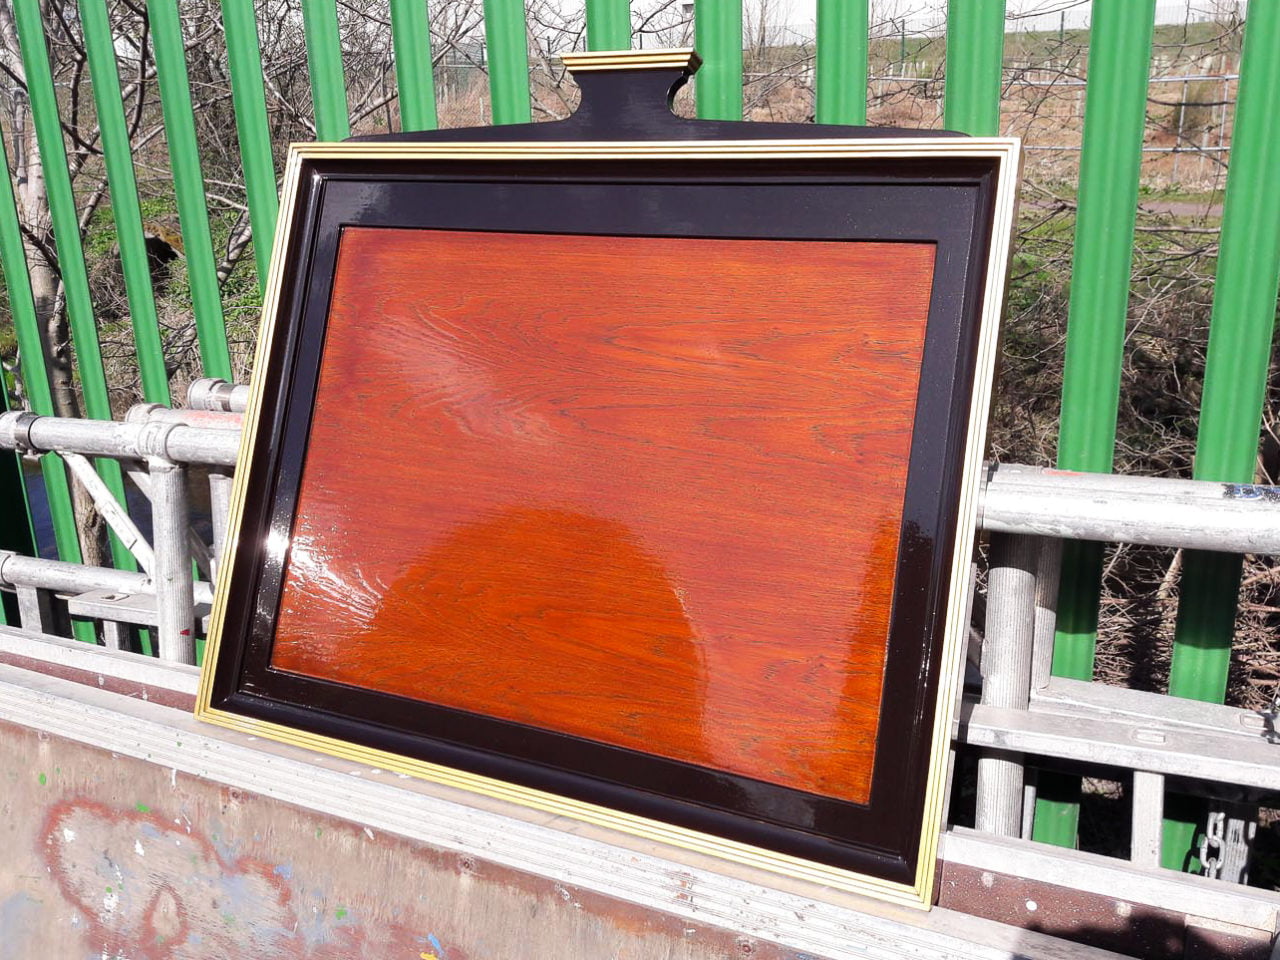
As shown, the gold details are gleaming, and the face is ready for applying the lettering to the mirrored surface. Further details can also be added to enhance the appeal, such as complimentary fixings in a gold finish.
When the honours board is eventually fixed to an interior wall, this will last indefinitely. Even in direct sunlight, the board will still remain brilliant for years to come.
Key Points
- Remove all dust from your panel
- Place the panel on a stable surface at a suitable height
- Plan your painting route
- Keep the stain and varnish thin and workable
- Always retain a wet edge
- Paint swiftly
- Ensure the coating is dry before sanding or painting again
Thanks for reading.
See more honours boards here.