07740 877 544
Estimated reading time: 9 minutes
Learn how to make a pounce pattern for traditional signwriting with this easy to follow, photo packed article. This short guide is full of interesting tips which will help you to make multiple, identical hand lettered signs accurately.
Why use a pounce pattern for traditional signwriting?
This age old method for transferring shapes and patterns is easy and cost efficient. As well as being quick to implement across multiple surfaces. The pounce pattern also avoids having to repeatedly use a tracing paper pattern for transferring your design onto several of the same signs.
Tools and materials used for this guide
- Your scaled design drawn on thick paper (approx. 210gsm is good)
- Your panel which will be hand lettered with paint
- Pounce wheels
- Pounce pad
- Pounce powder – black or white
- A cork board or rubber mat for your tabletop
- 1” (25mm) masking tape
Where to begin
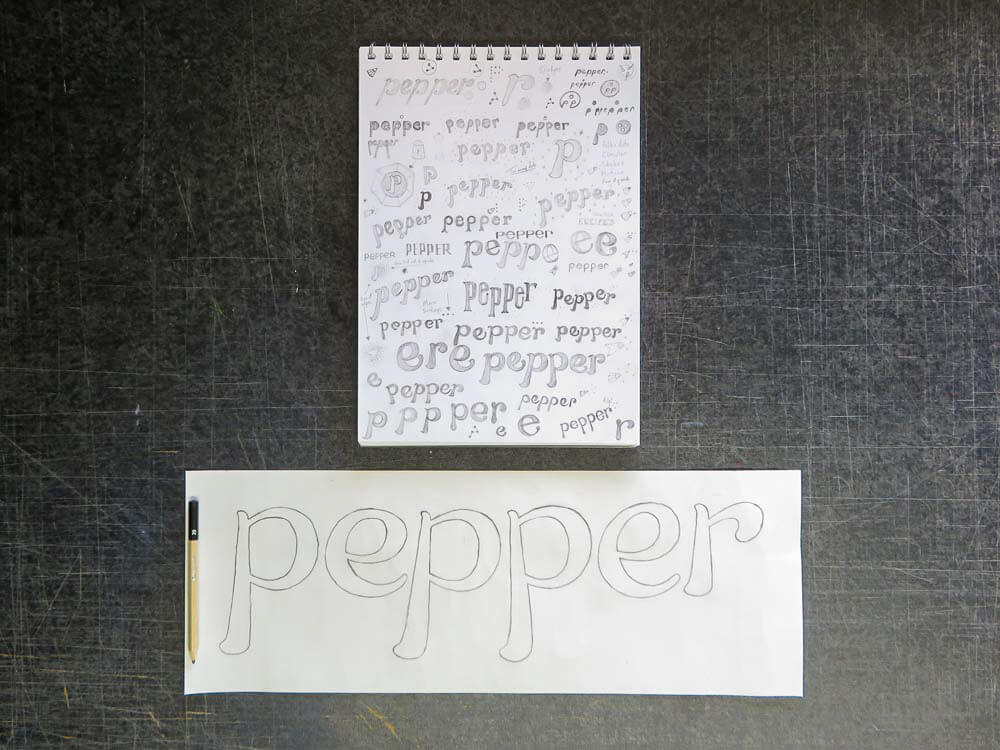
These sketched ideas were scaled and drawn for custom lettering which will be used in a restaurant logo. I want the finished letters to have a hand lettered look and be painted onto a panel.

I’ve measured the lettering size to fit into my scanner bed, so this will be the approximate position of the finished, hand lettering on the sign.
I will then scan the panel once the paint is dry, before vectorising in my sign making software.

I’m using wall lining paper which is widely available from DIY stores. This is the fairly thick paper which is pasted onto bare walls before wallpaper is hung on top. The lining paper comes in rolls and is most always cheap to buy.
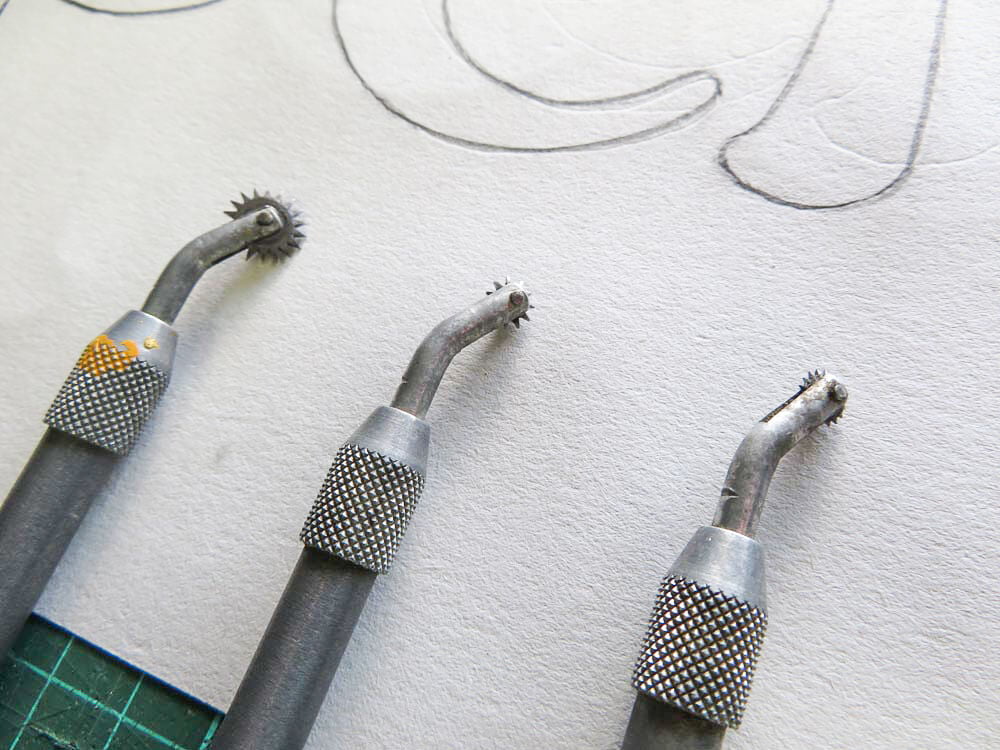
These are three different sized pounce wheels. They are small hand tools with jagged wheels which can turn at acute curves and corners.
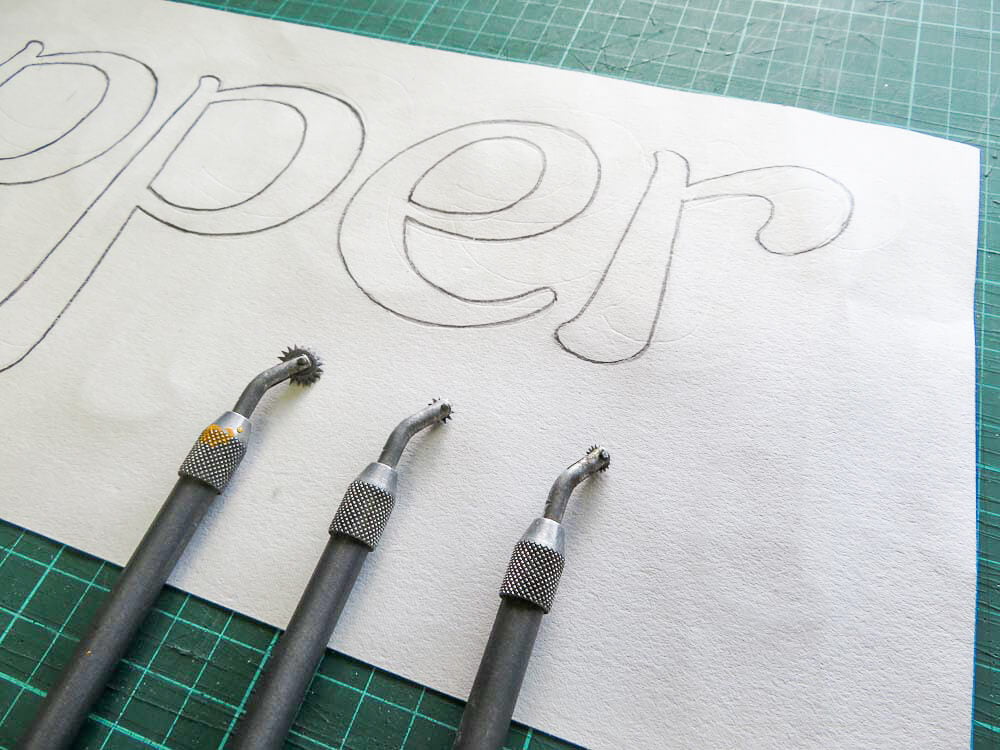
For this smaller panel painting project, I use a cutting mat to protect the surface which I’m working on. This also provides a soft background to help the pounce wheel pierce the paper.
For larger paper pounce patterns, I use a cork board or the back of a chipboard panel. The softer the rigid panel below your paper pattern is, the easier it will be to turn the pounce wheel.
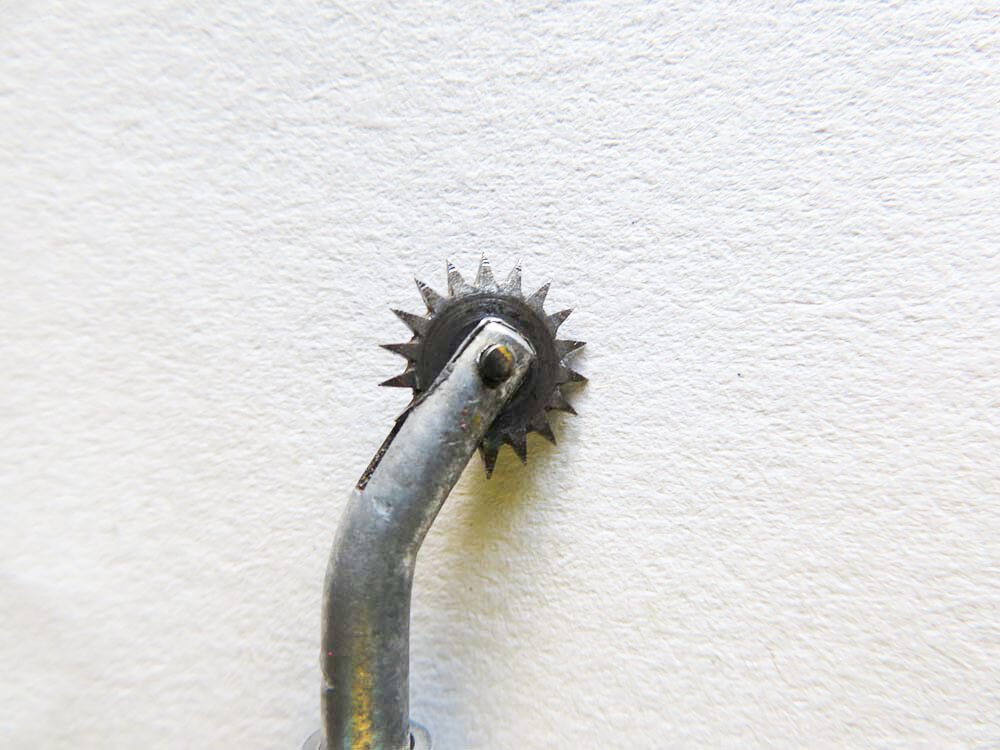
This is the largest of the three pounce wheels that I own. I use this predominantly for larger shapes and letters, with longer design lines.
The smaller pounce wheels are used for tighter corners and small circles. The smaller the pounce wheel used, the more defined a pattern you will have when using the pounce pattern.
The closer the spikes are together on the wheel will leave a more continuous pattern on your signwriting surface.
Perforating the pattern
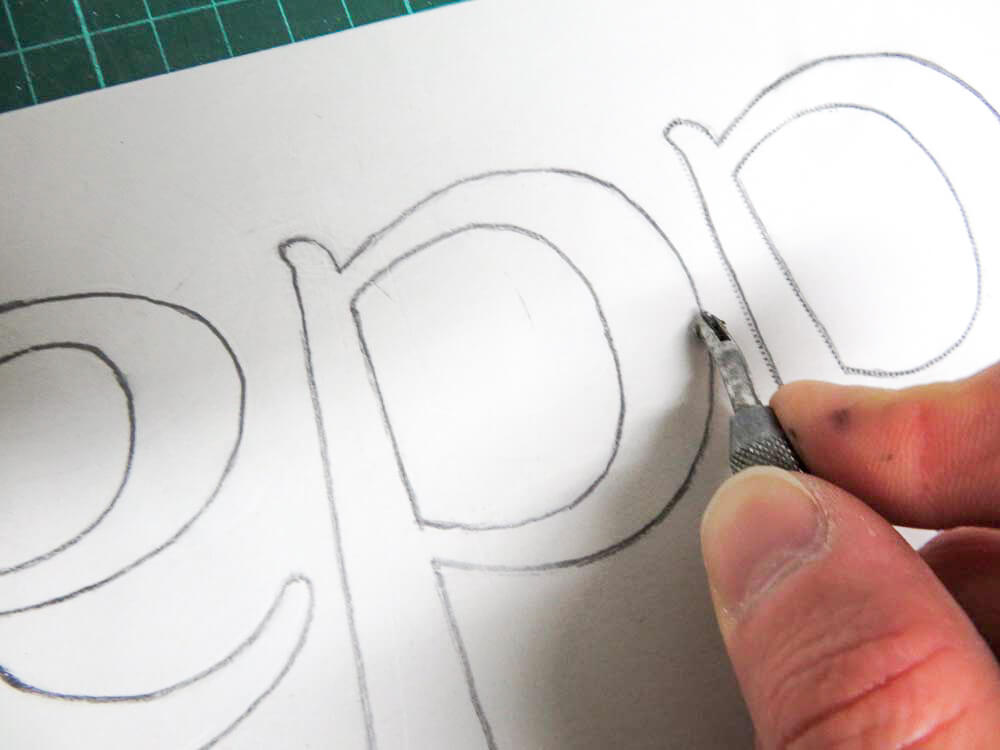
Using firm pressure, I push down on the pencil lines with the pounce wheel and follow the drawn shapes as close as I can.
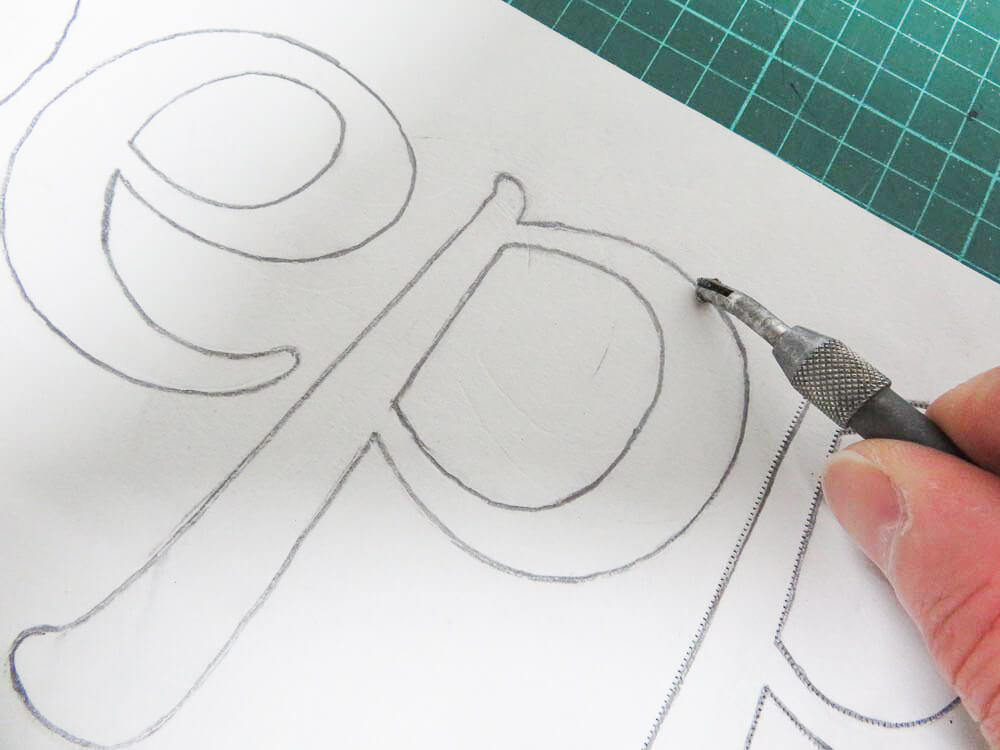
It can be tricky turning the wheel and accurately following the lines, especially on tight curves or small circles. Turn the paper and mat below to save contorting your arm and wrist for smaller curves.
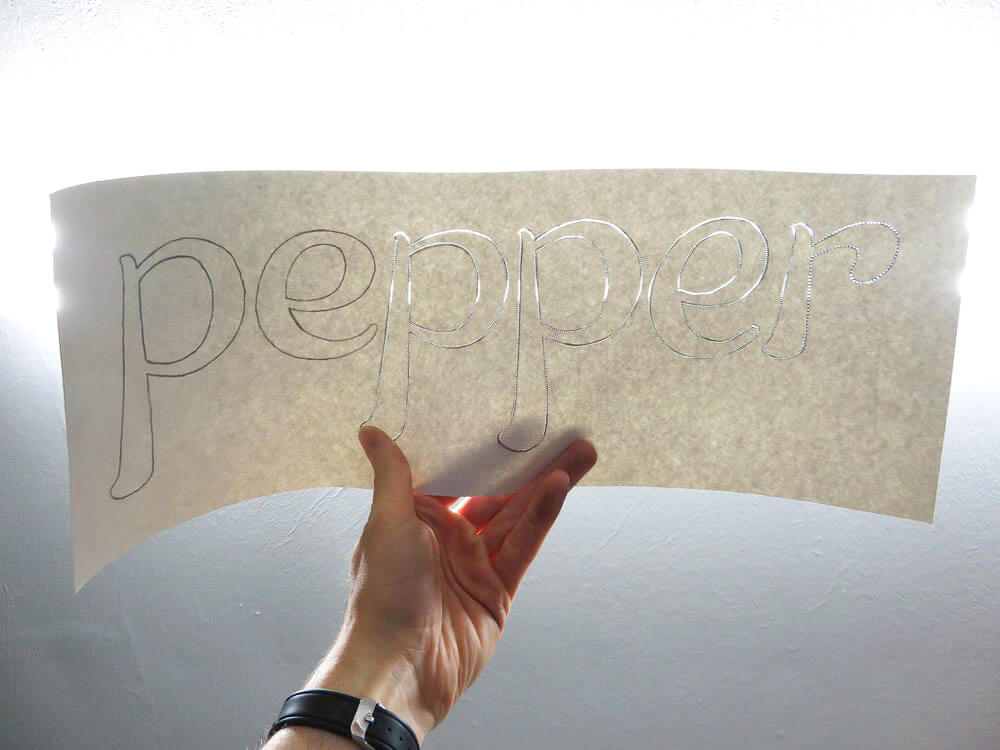
The paper pattern is just over half perforated with the visible line which the light is shining through. The larger the pounce wheel, the less defined the line due to the points being farther apart.
The pounce pad and powder
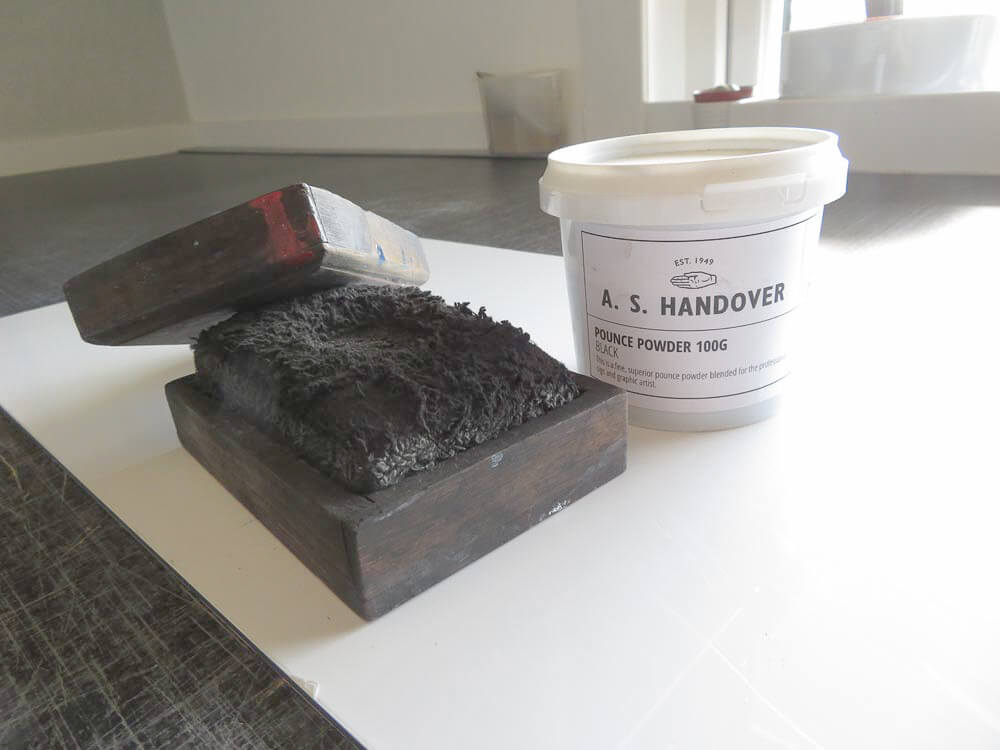
The pounce pad is filled with the powder from behind the removable pad. The powder travels through the pad when banged or rubbed firmly onto a surface.
This is a traditional tool which is encased a small wooden box. You can make a simpler pounce pad using powder inside a square cut, textile rag or cloth. Tip a small amount of powder into the centre of the cloth and roll into a ball before taping the corner ends tightly with masking tape.
The finished makeshift pad should look like a ball (containing the powder) with the tightly taped neck underneath.
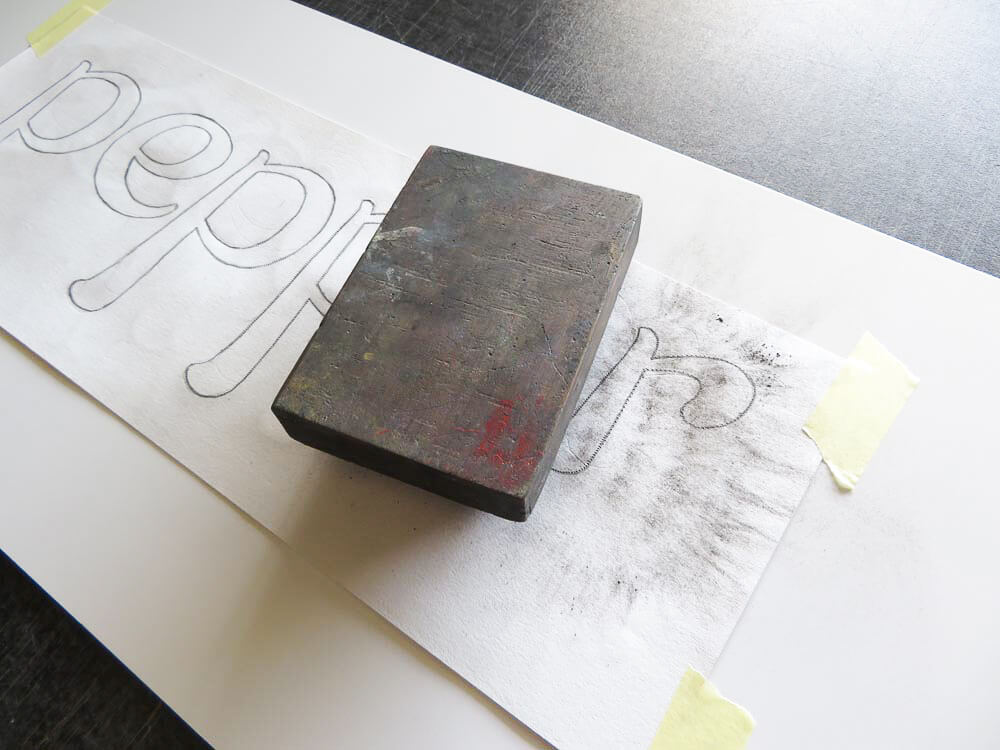
The pounce pad handle is the bottom segment of the encased wooden block. Here you can see where I have started tapping the pad on my pattern.
Pouncing the perforated pattern
Once your perforated pattern is taped into place on your panel, you are ready to transfer the pattern through the perforation.
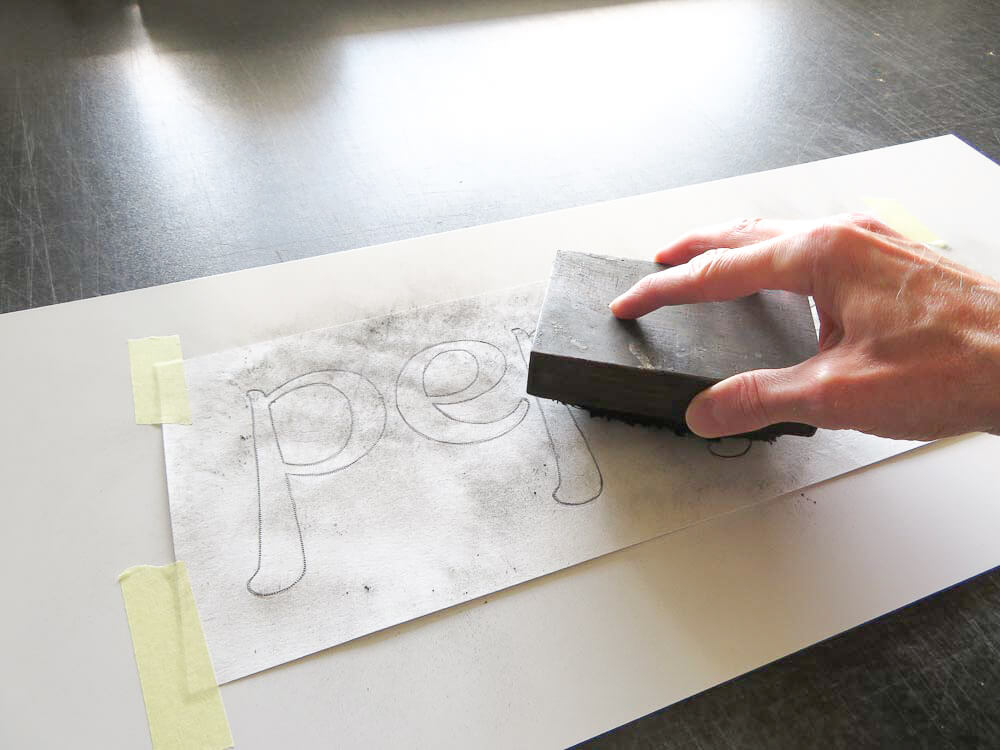
With a combination of tapping the pad and rubbing the surface, ensure that the powder covers the perforated pencil lines. Small clouds of powder will rise from the surface, so try to work in a well ventilated area.
This can be quite a messy part of the process, so start with gentle taps rather than pounding down hard onto your panel surface.
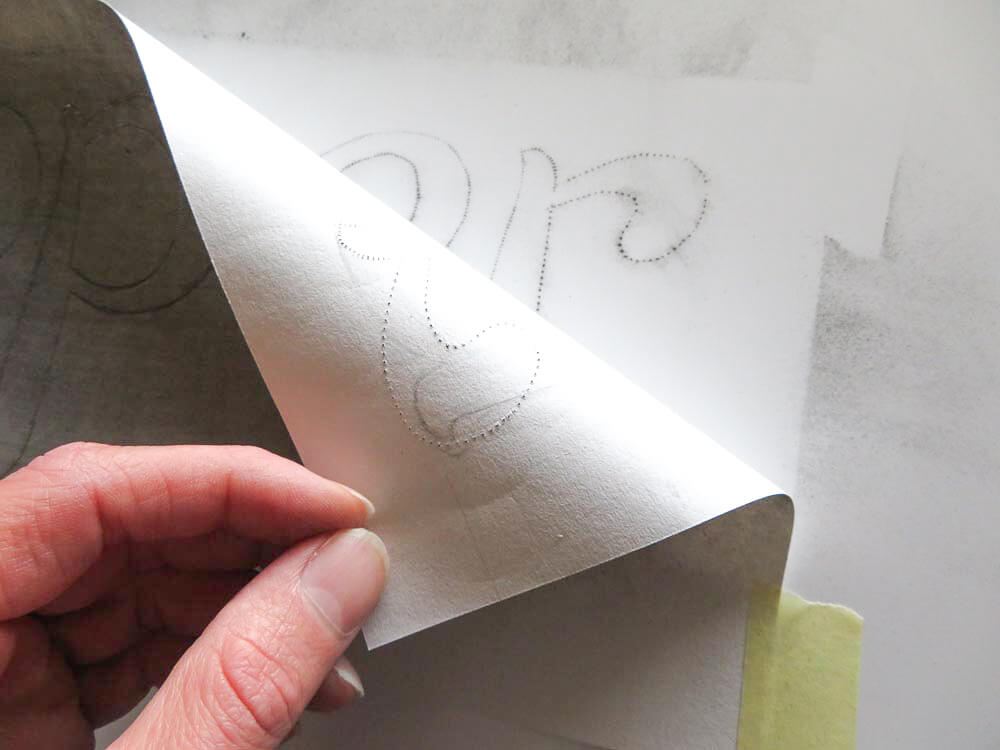
Always peel back a small corner or edge first, before removing the entire paper pattern. If the pattern has not adequately transferred onto the surface, you will still have the exact position of the pattern still in place.
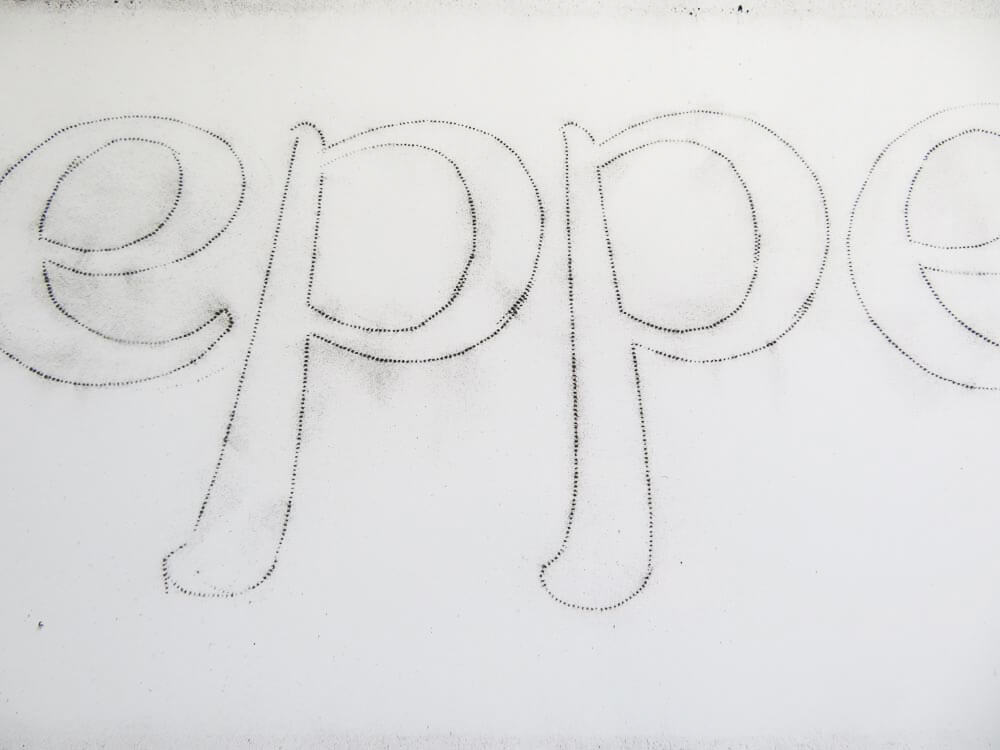
Once the paper pattern is removed completely, you can see where your perforated lines have allowed the powder to travel through.
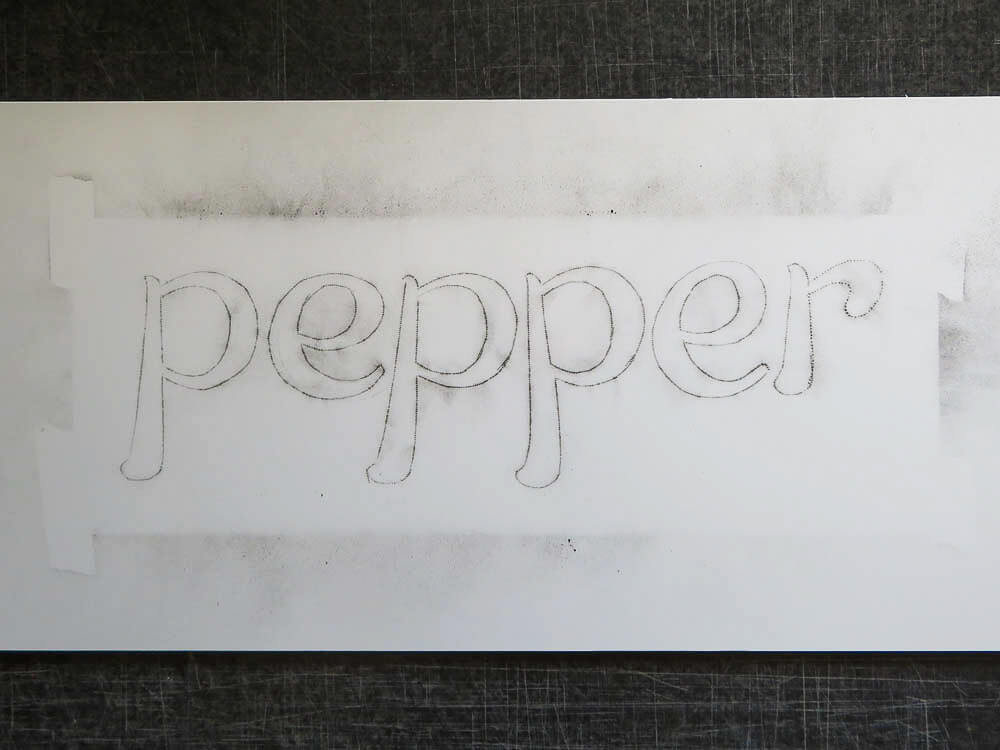
When there are multiple panels with the same design to be hand lettered, the pattern transfer process is swift and easy. Finish by gently wiping away any excess powder by using a damp cloth and then dry afterwards.
The pattern left behind can now be painted with your signwriting brushes.
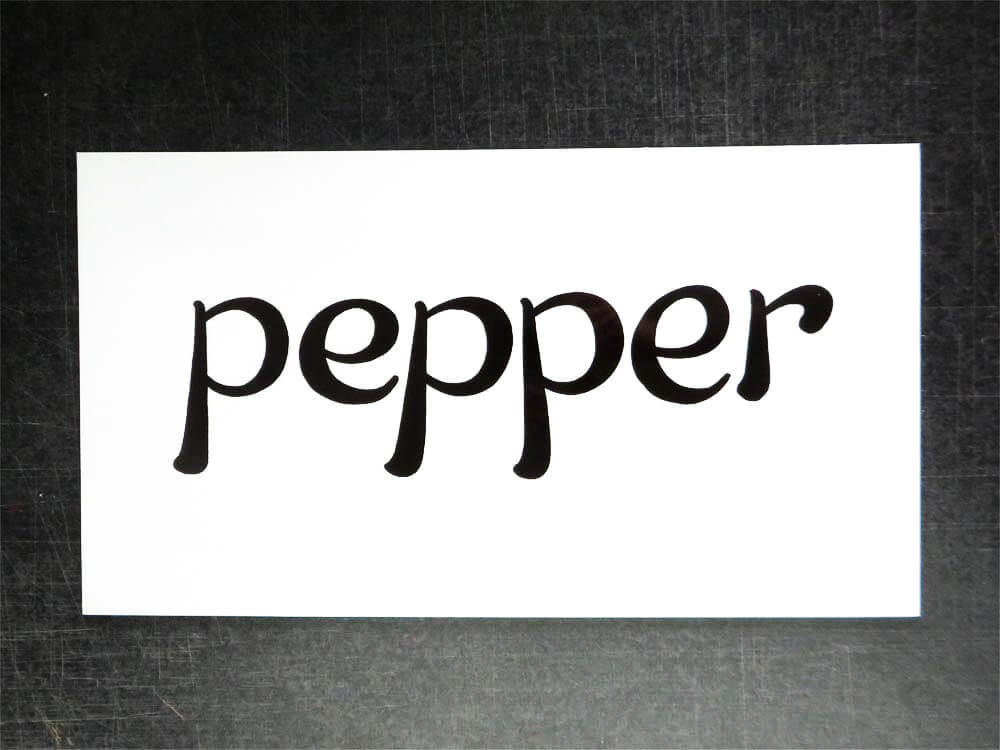
The hand lettered panel in a dark brown, peppery colour. Now ready to be scanned into my software after the paint has dried.
The end result
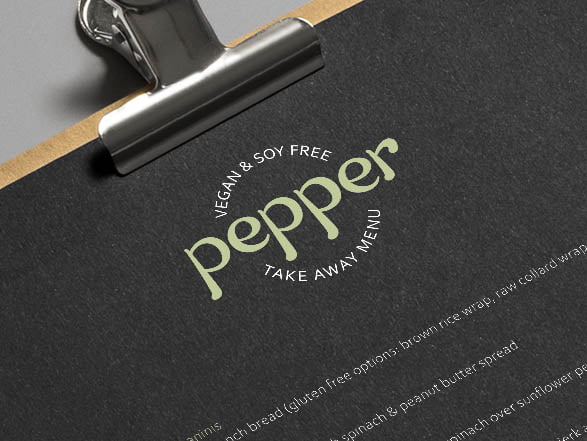
After slight modifications on the computer, I have a vectorised version of my hand lettering. Now scalable and legible at a small size for various reproduction. This ensures the hand lettered look which I wanted the lettering to accomplish in the logo.
Key Points
- Lining paper is a cost efficient and easily sourced paper for pouncing
- Place a cutting mat or softwood board beneath your paper pattern
- Use the correct sized wheel suited for the curvatures of your pattern
- Gentle taps and peel back a corner to check
- Open a window or work in a suitably ventilated area
This transfer method is a traditional signwriting practise and can be used and adapted for different projects such as dressmaking and in woodwork. Have fun with your next pounce pattern project.